Crop app
This app can be used for cropping (or masking) parts of an image in order to reduce the image size, improve the image registration or to remove unwanted parts of the image.
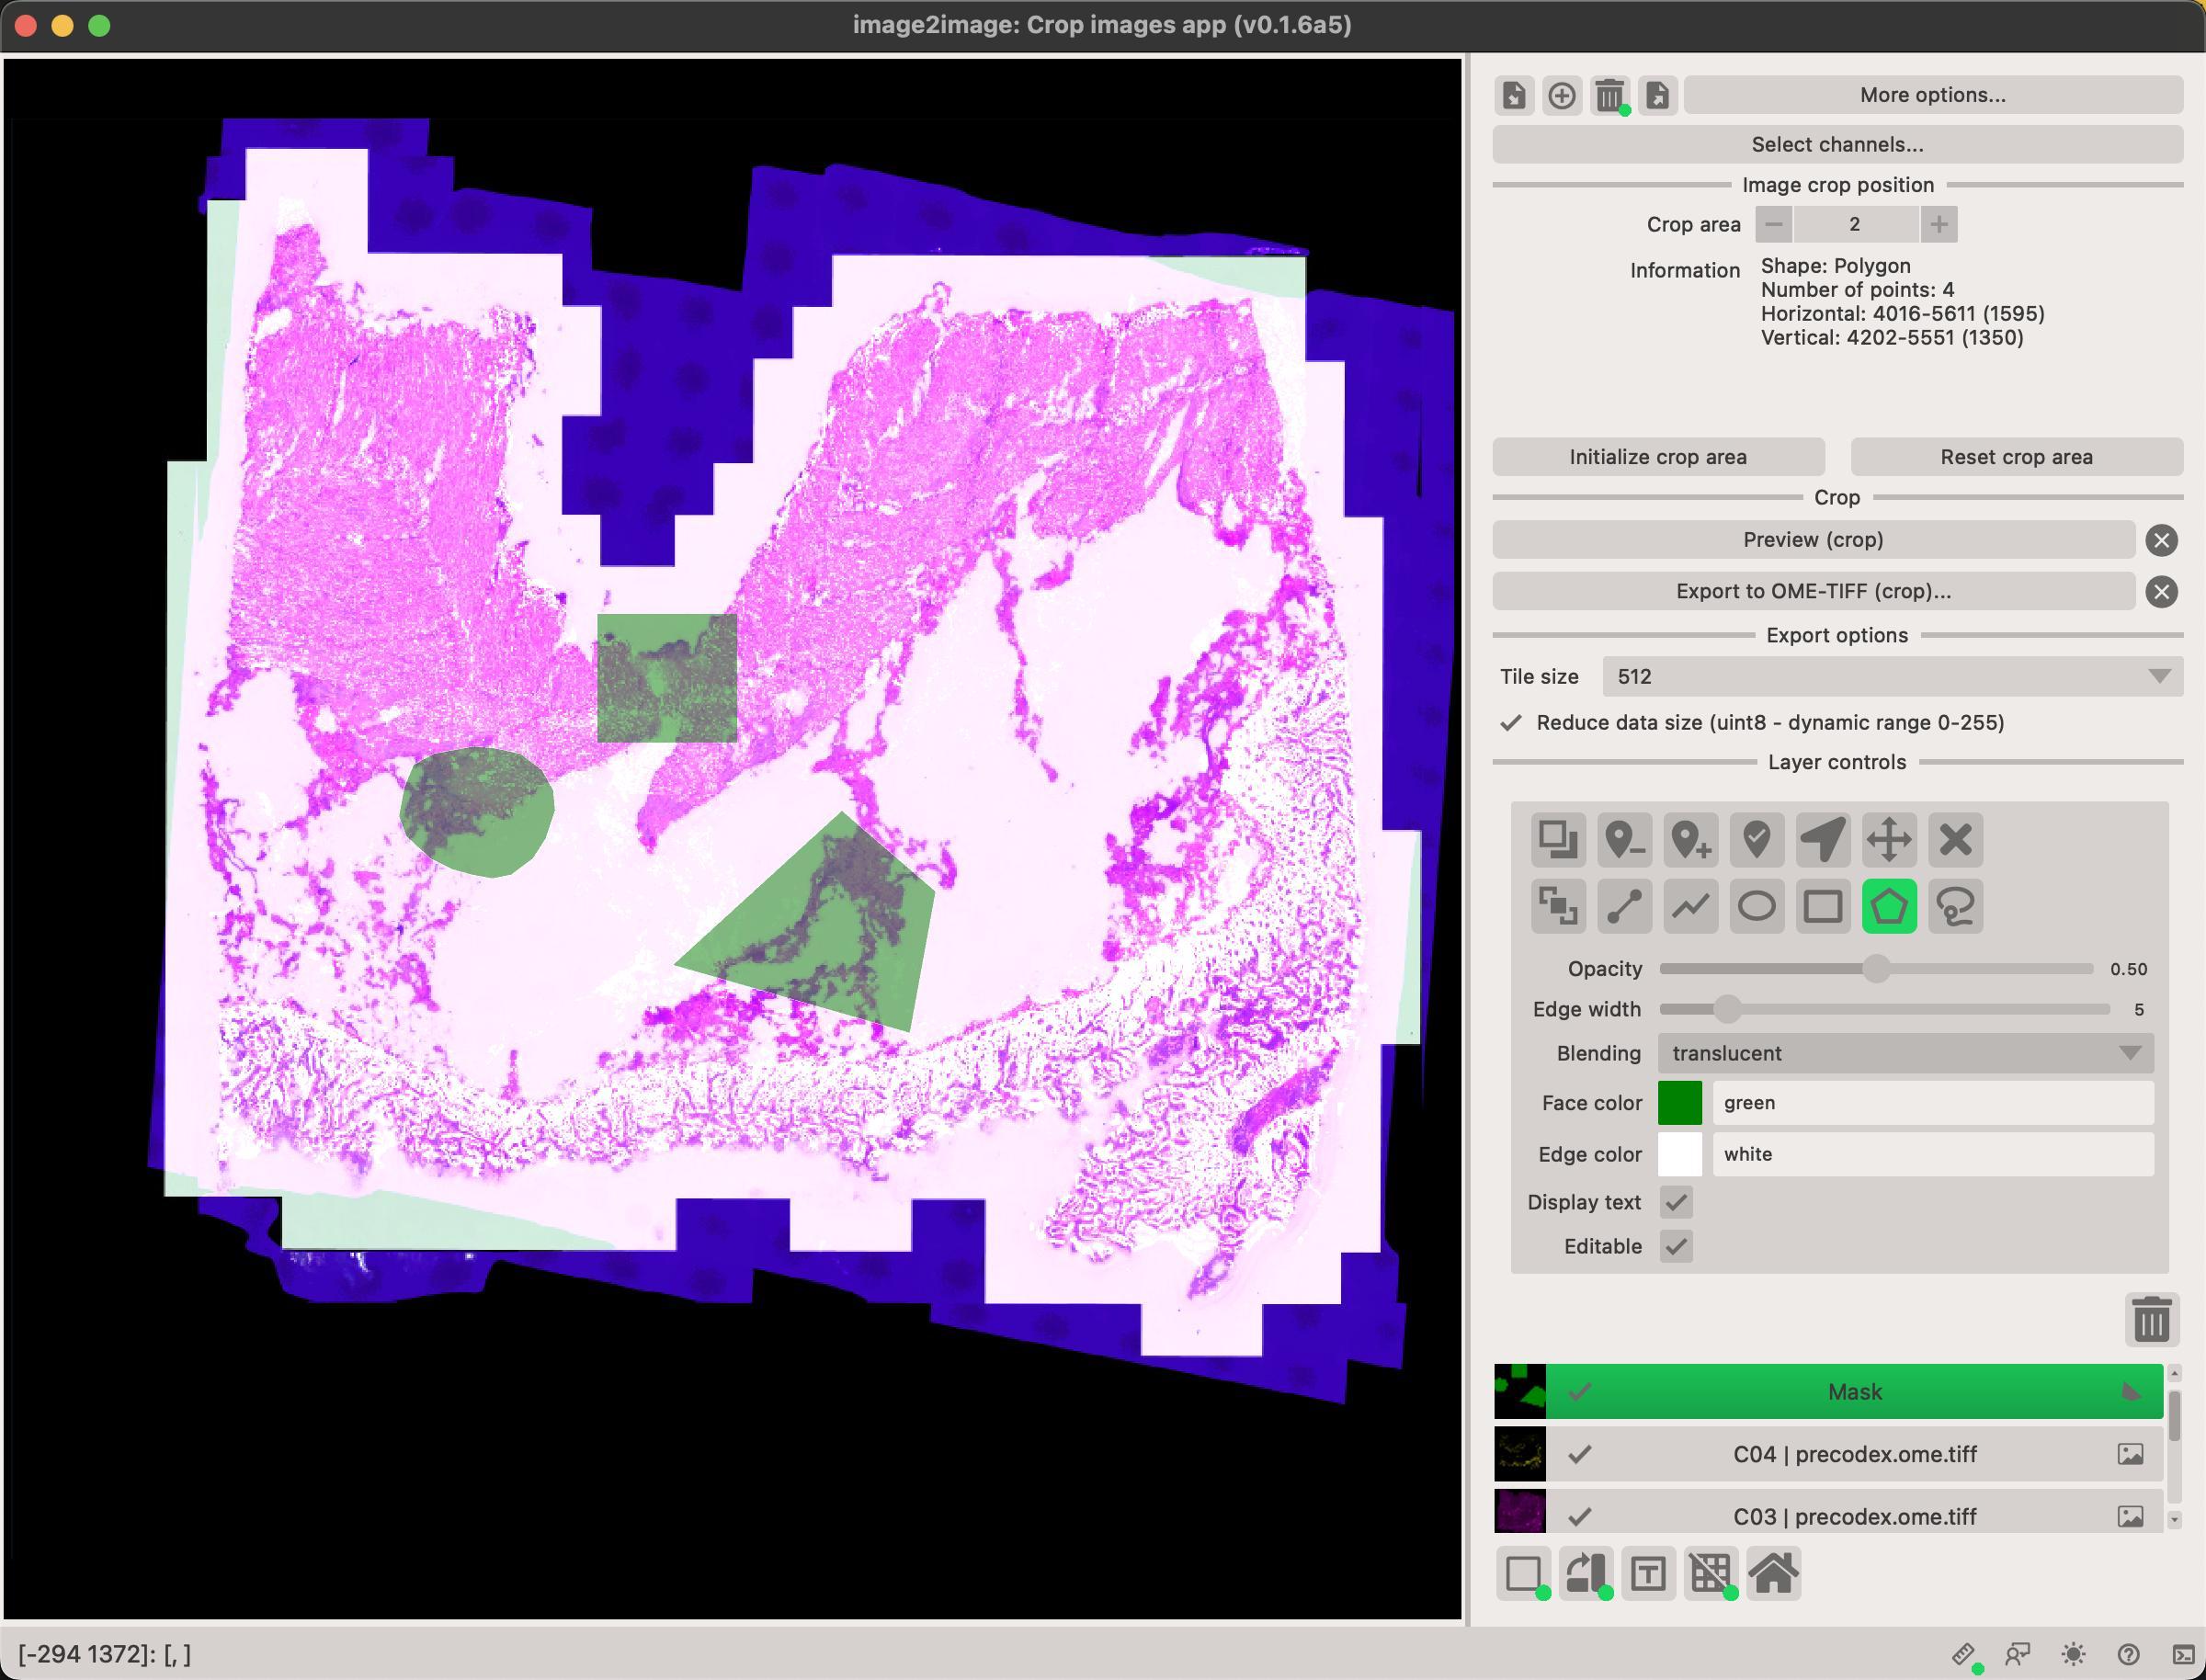
Steps to crop an image
- Load image(s) by clicking on the button. This will let you select images to load. You can alternatively drag-and-drop images into the canvas.
- Select the
Masklayer in the viewer controls at the bottom right-hand side. - Select the tool you wish to use. You can choose from
circle,rectangle,polygonorfreehandtools. - Draw the mask on the image. You can adjust the mask by clicking on the
Masklayer in the viewer controls and then clicking on theeditbutton. This will allow you to move the mask, change it's shape or delete it.
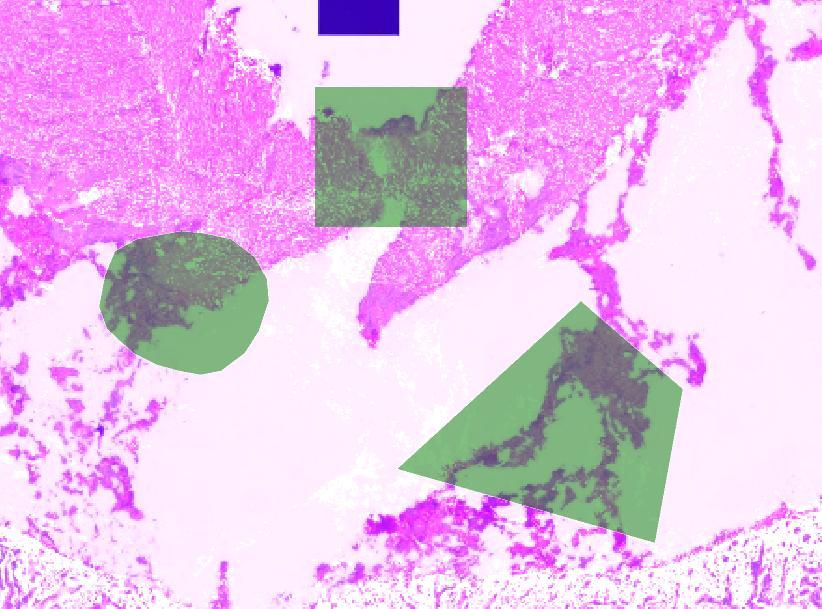
Multiple masks are allowed
You can draw multiple masks on the image. This is useful if you want to crop multiple regions of same image.
Multiple images are allowed
You can load multiple images (e.g. if they are co-registered together) and crop all of them at once. This will ensure that the cropped regions are the same in all images.
Previewing the cropped image
You can preview the cropped image by clicking on the Preview (crop) button. This will create a new image with the cropped region.
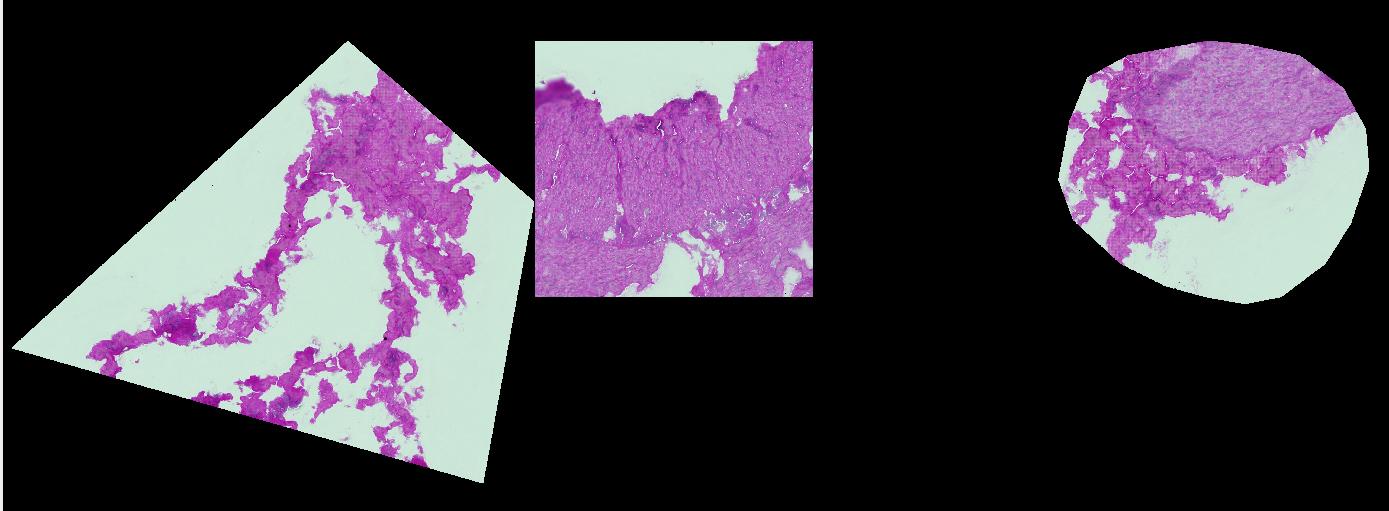
When cropping images, different shapes behave slightly differently.
- the
rectangleshape will crop the image to the rectangle that you've drawn. - the
circle,polygonandfreehandshapes will crop the bounding box of the polygon that you've drawn, however, any region outside of the drawn region will be masked.
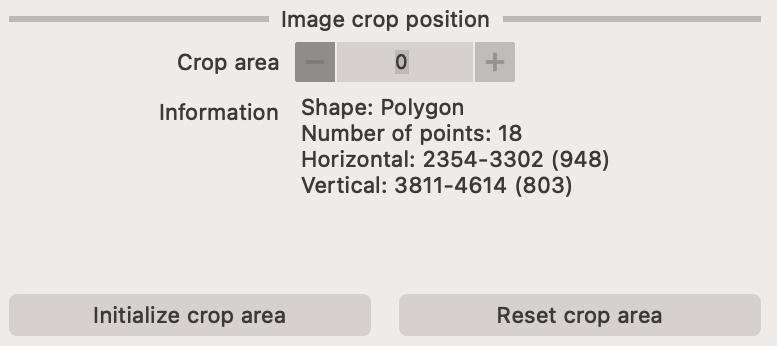
Information about the mask
You can see basic information about each mask in the Image crop position section of the panel.