Viewer app
This app can be used to overlay multiple images together. You can optionally display images with different registration (transformation) information, although, all the images must have ONE common image.
For instance, you have the following images:
- H&E or PAS stain
- preIMS AF
- IMS
- postIMS AF
- CODEX or Xenium data
Normally you would co-register your H&E, preIMS and postIMS AF together but for some reason you didn't, but you still wanted to overlay them. In this case, you would perform manual registration using the register app which produces the i2r.json configuration file.
Steps to overlay multiple images together
- Select your images by clicking on the
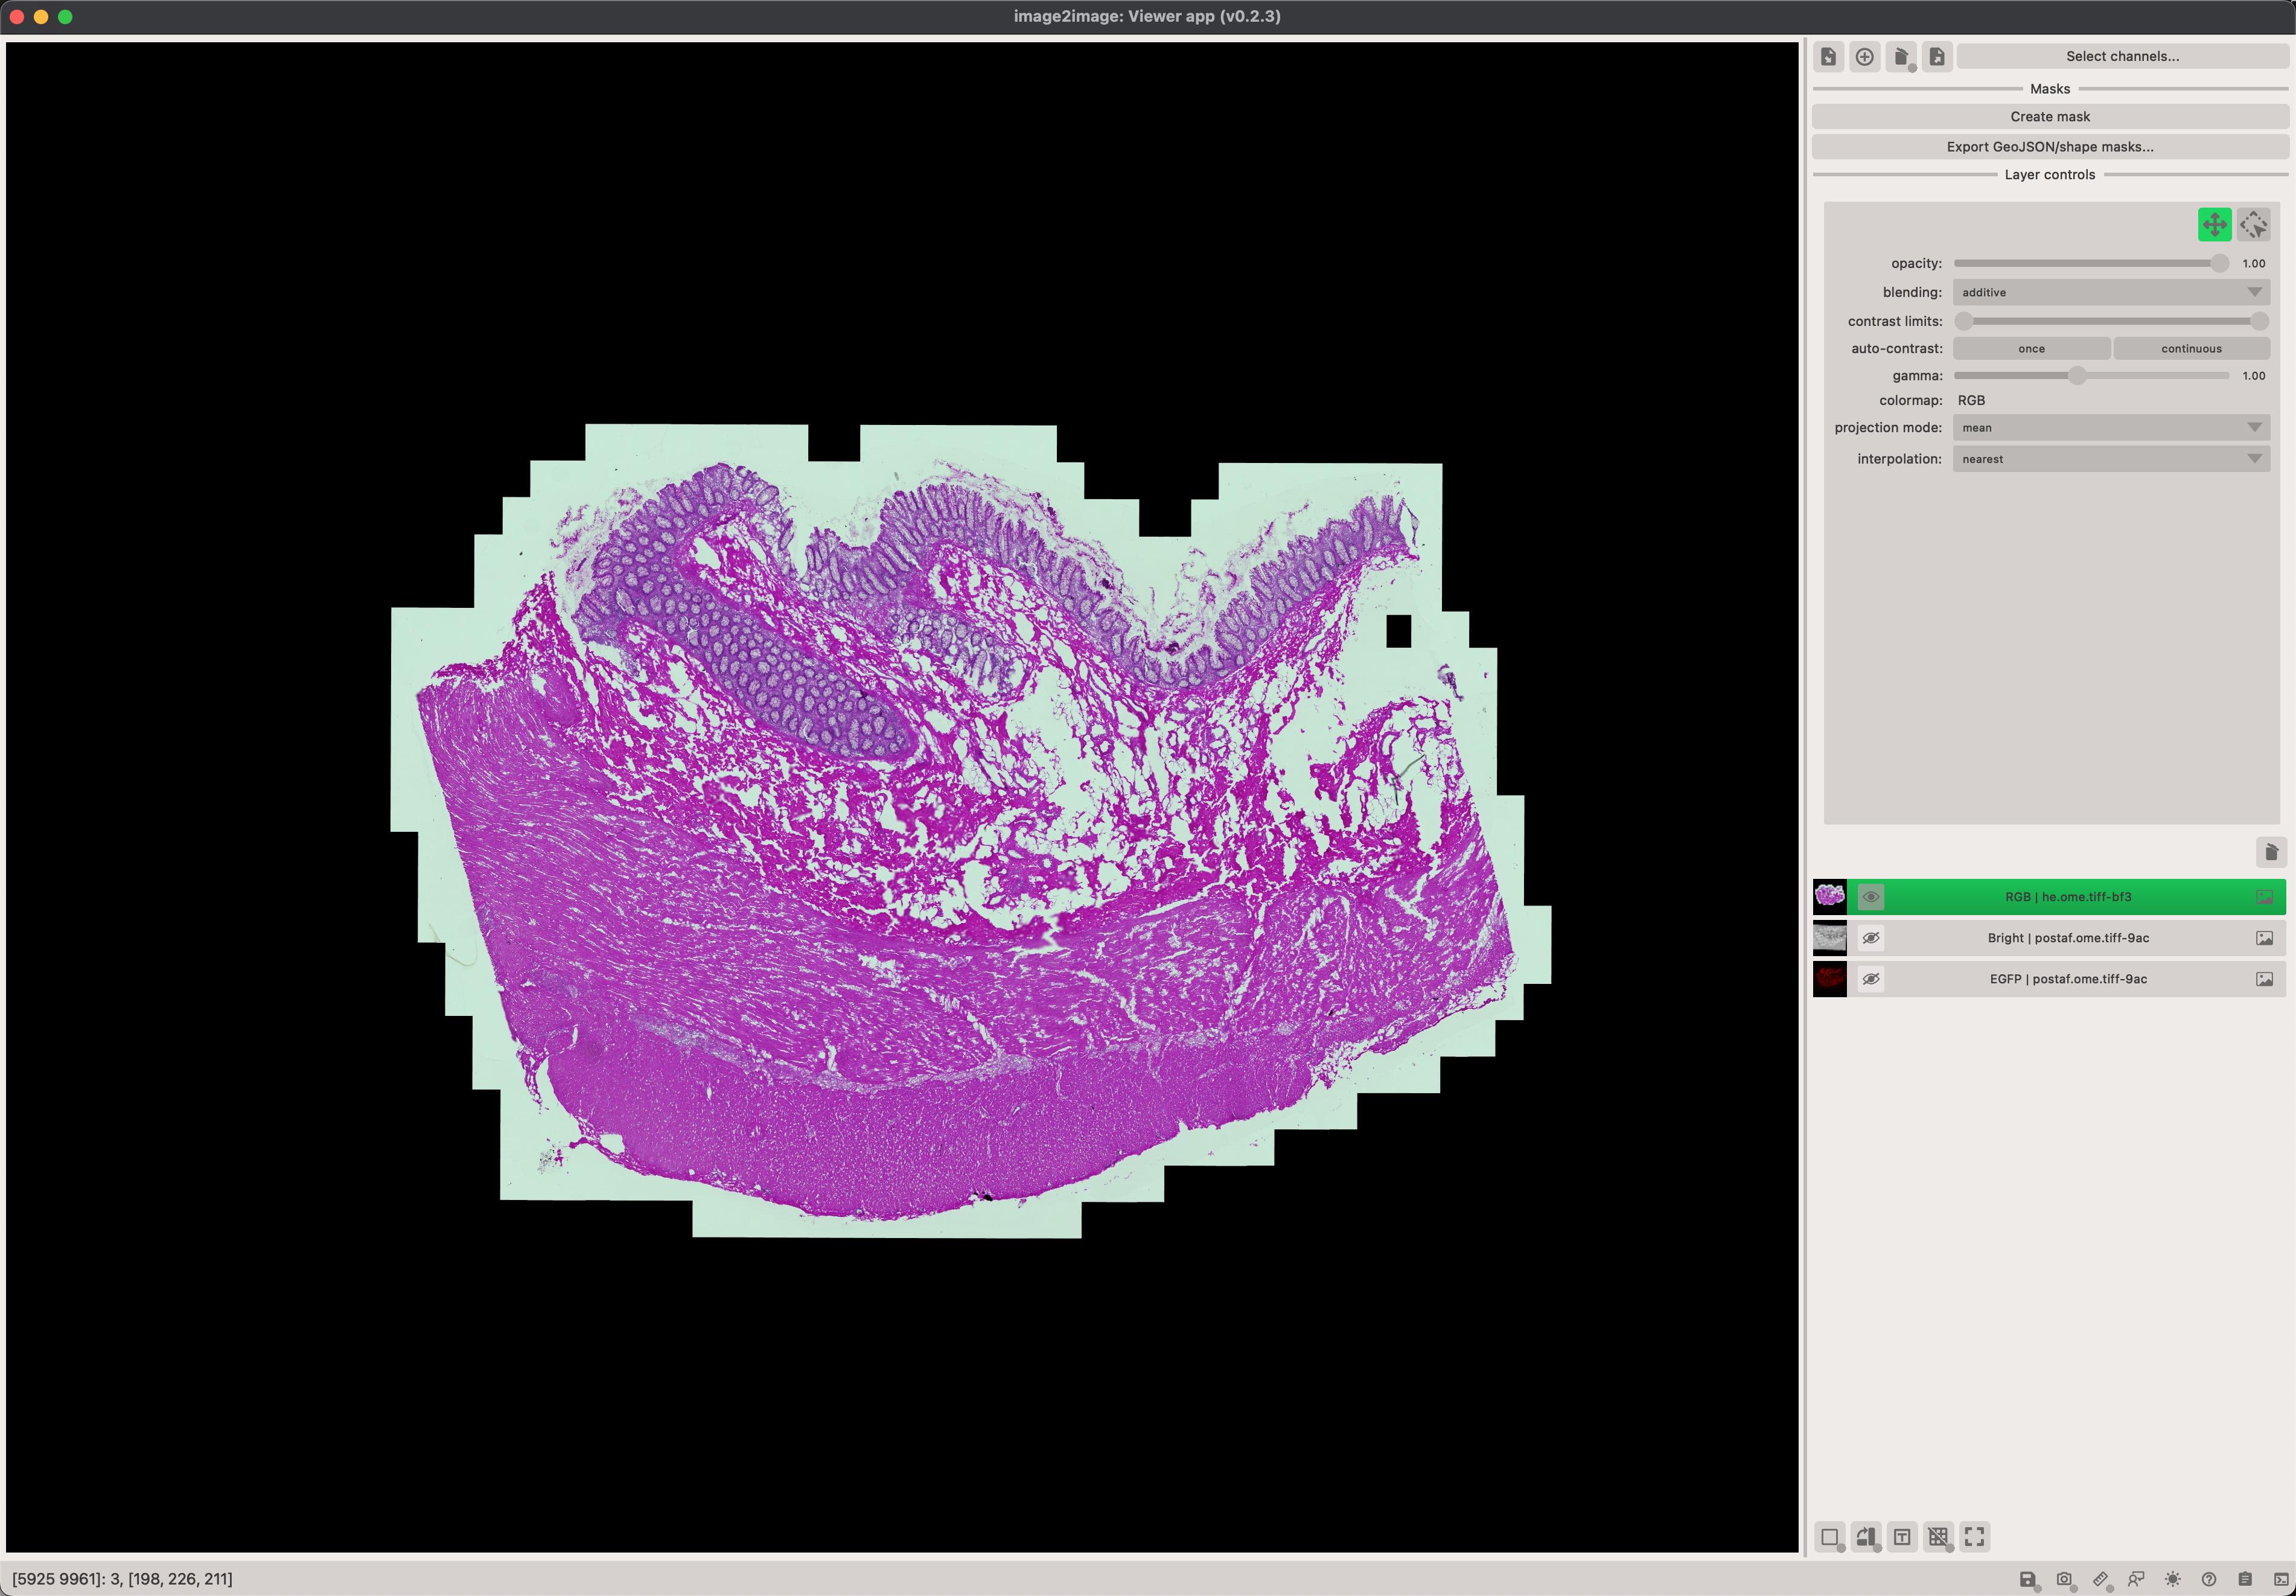
Add/remove dataset...button. This opens up a new popup window where you canAddandRemoveimages. Make sure to also specify the pixel size/resolution in the table. You can do so by double-clicking Left Button in the field and entering the value. - Select the channels that you want to immediately display. All channels will be loaded BUT not all of them will be displayed immediately. You can show/hide them by using the
layer controlsand clicking on the / icon. - (optional) If the image you are displaying needs to be
transformedto a new coordinate system (e.g. IMS to H&E), click on theSelect transformationbutton. This opens a new popup window where you can load and select transformations for each image. To add a new transformation from thei2r.jsonfile, click on the icon. - Adjust the visuals of each of the layers you wish to see in the
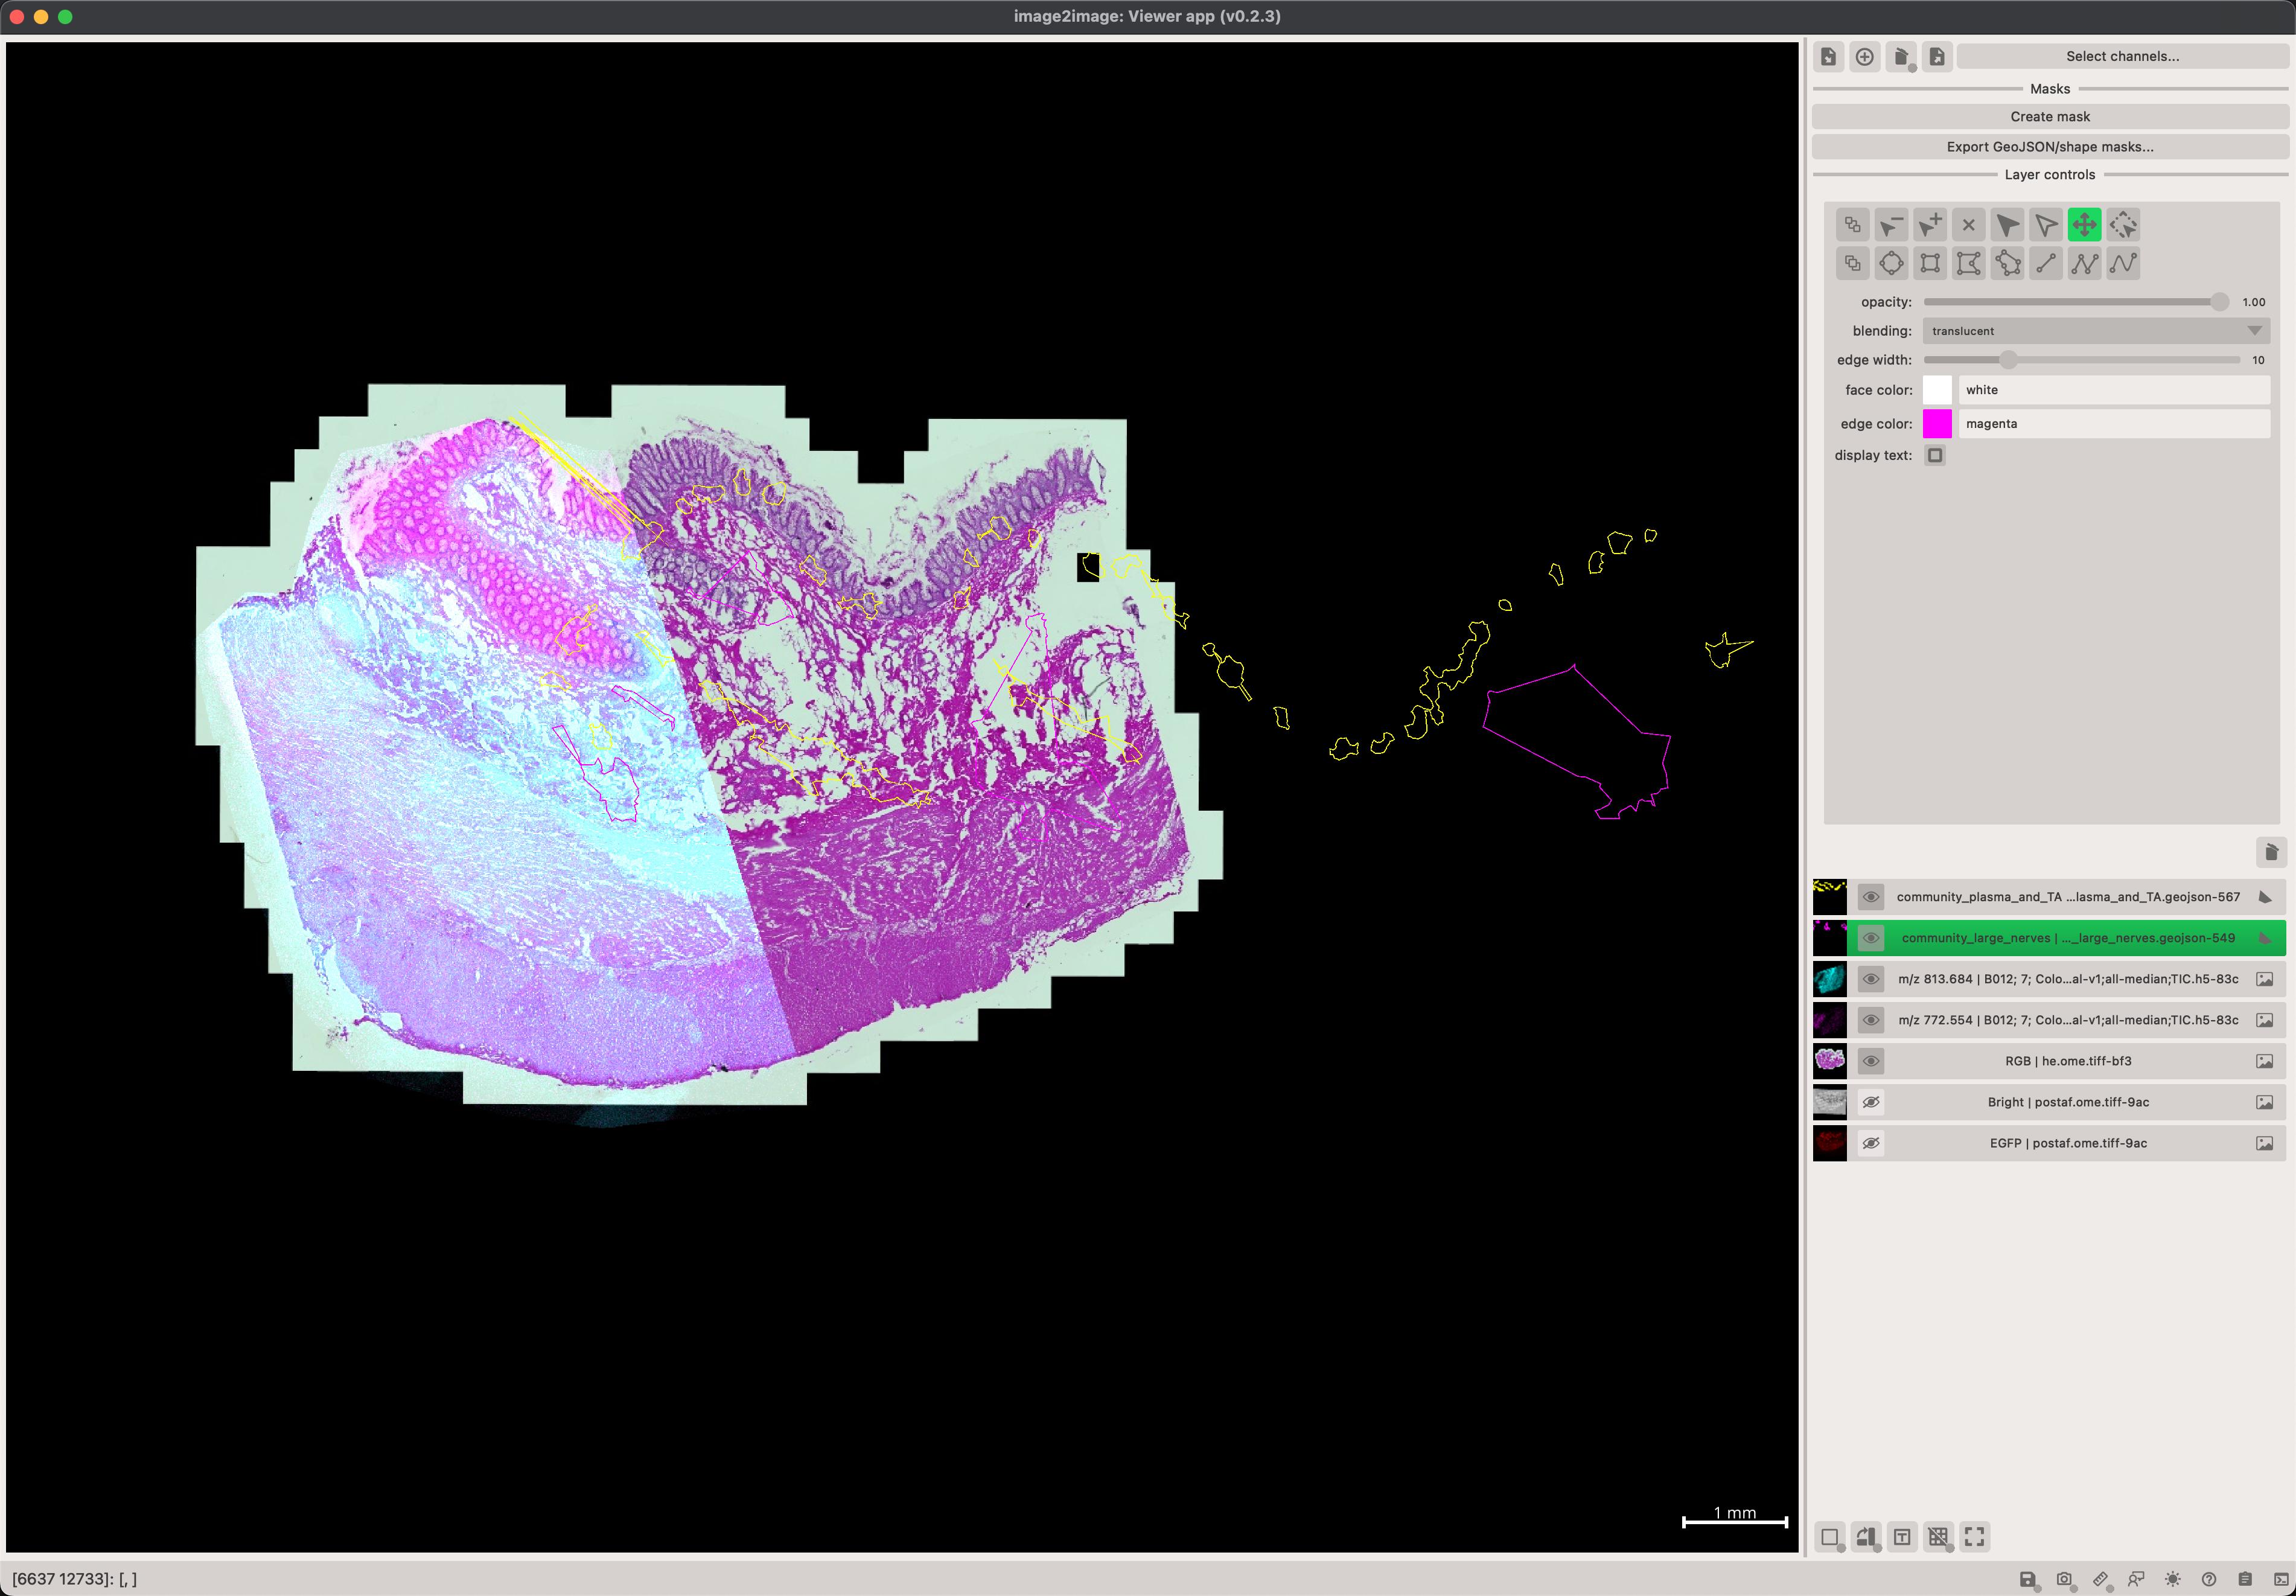
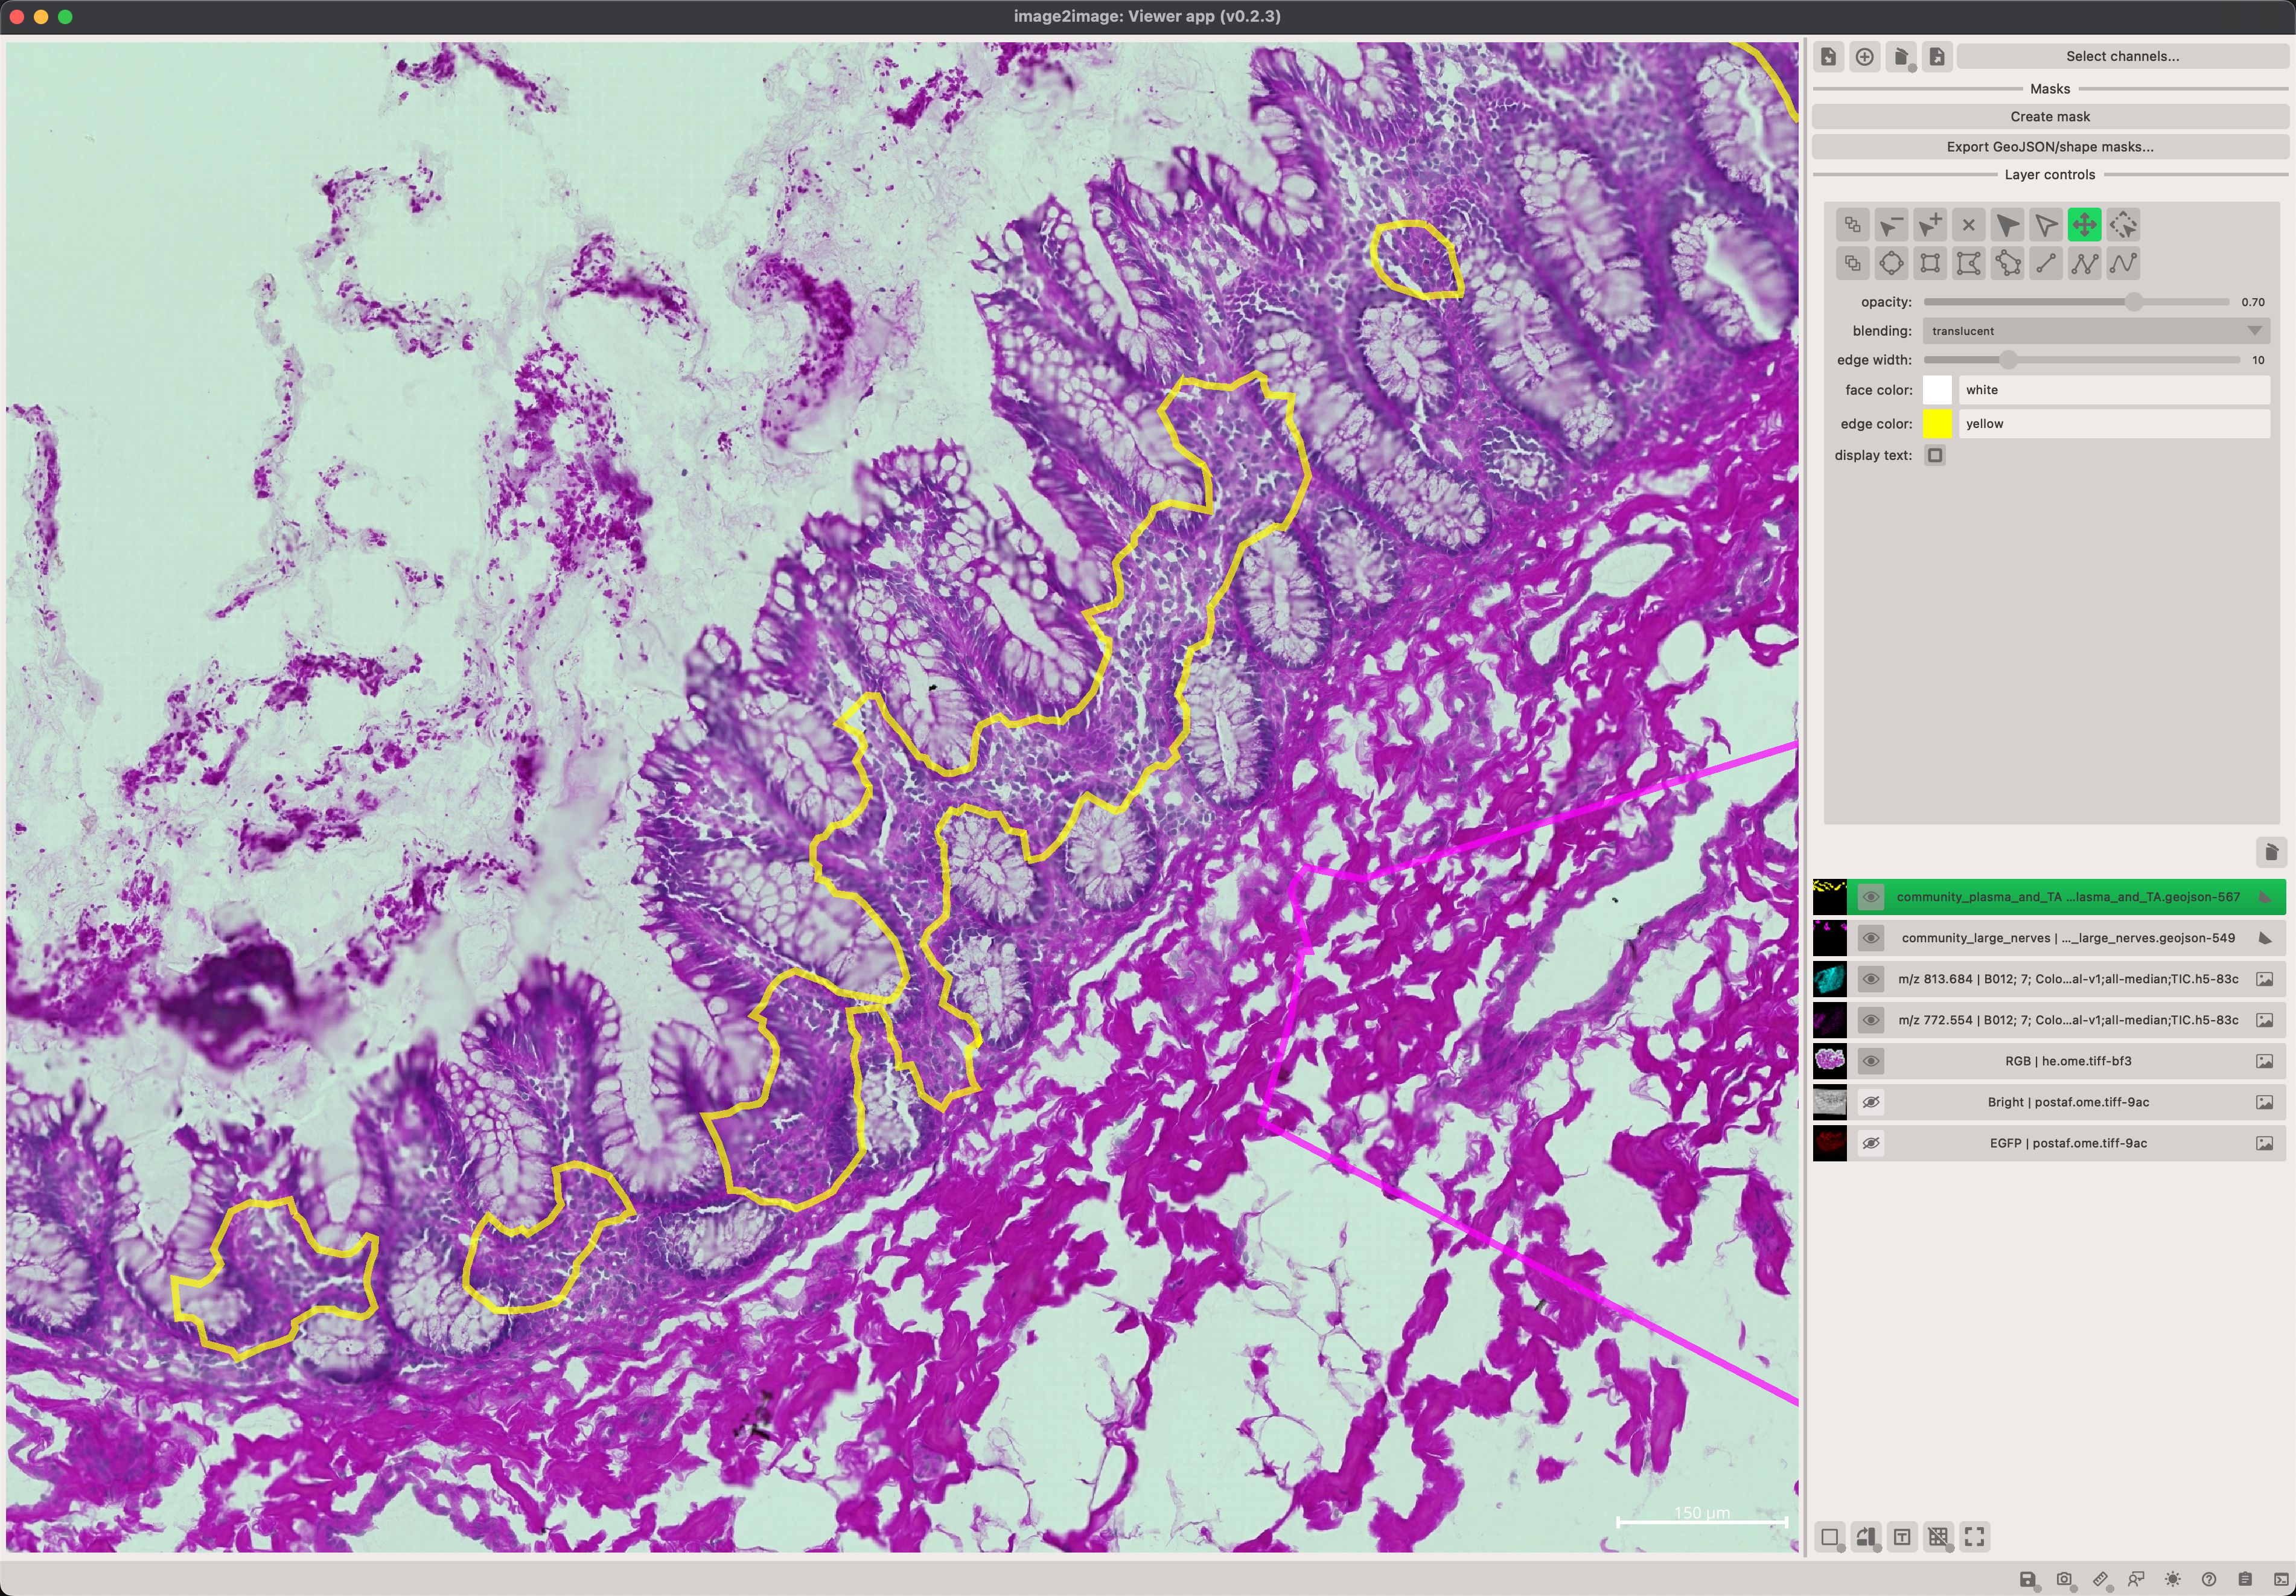
Layer controlssection. - You can export the information about currently loaded images to a
i2v.jsonproject file by clickin on theExport project...button. These can be re-loaded at later stage by using theImport project...button.
Scale and image resolution
It is essential that the pixel size value in the Datasets table is correct. Some files, such as GeoJSONs are often exported in the pixel coordinates (without multiplying by the pixel size of the image, meaning that overlaying them on the image will result in an improper scale if the image has been transformed by applying it's scale).
It's very easy to adjust the scale of any layer by changing the value of the pixel size in the table.
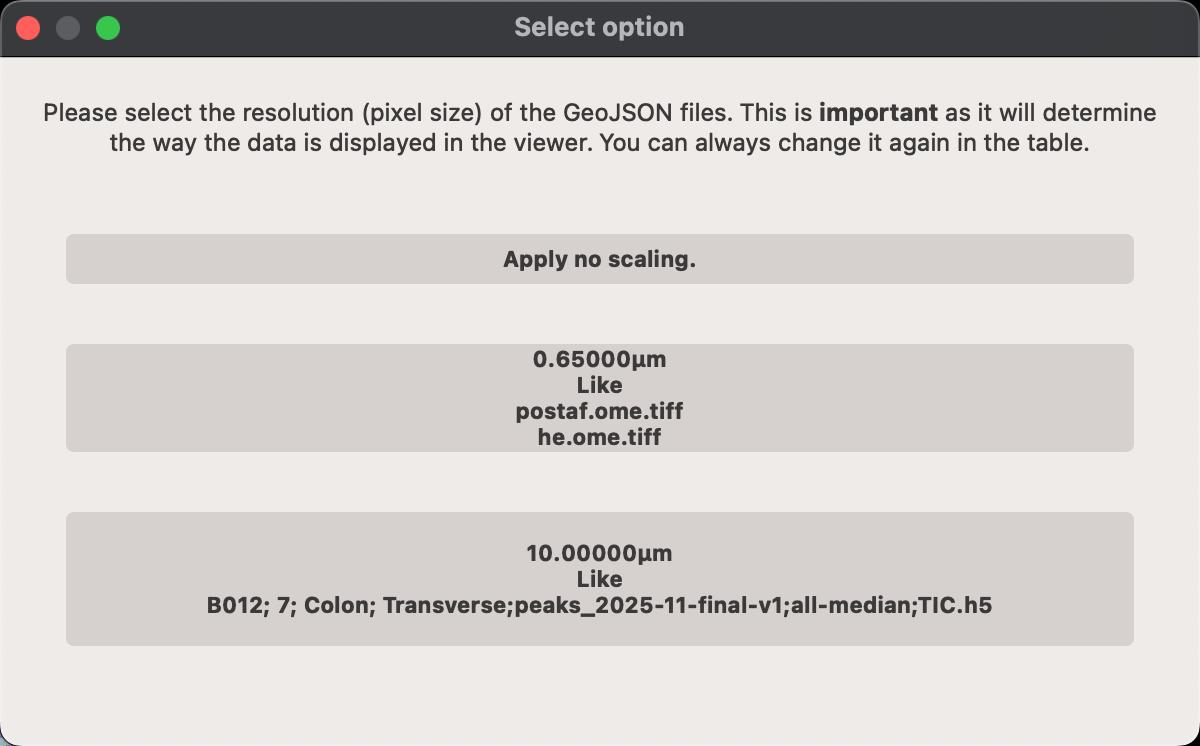
When you load data from GeoJSON or text files, you will be prompted to specify the pixel spacing so that the data is properly scaled to match the image. While its widely accepted that GeoJSON files should be exported in the pixel coordinates, some software export them in micrometer coordinates, so make sure to check which one is the case for your data.
Dialogs and widgets
Image selection
Click on the Select channels... button to open the popup window. The window shows a unified way of selecting which datasets and channels should be displayed, how the images (or other modalities) should be transform to the common coordinate system.
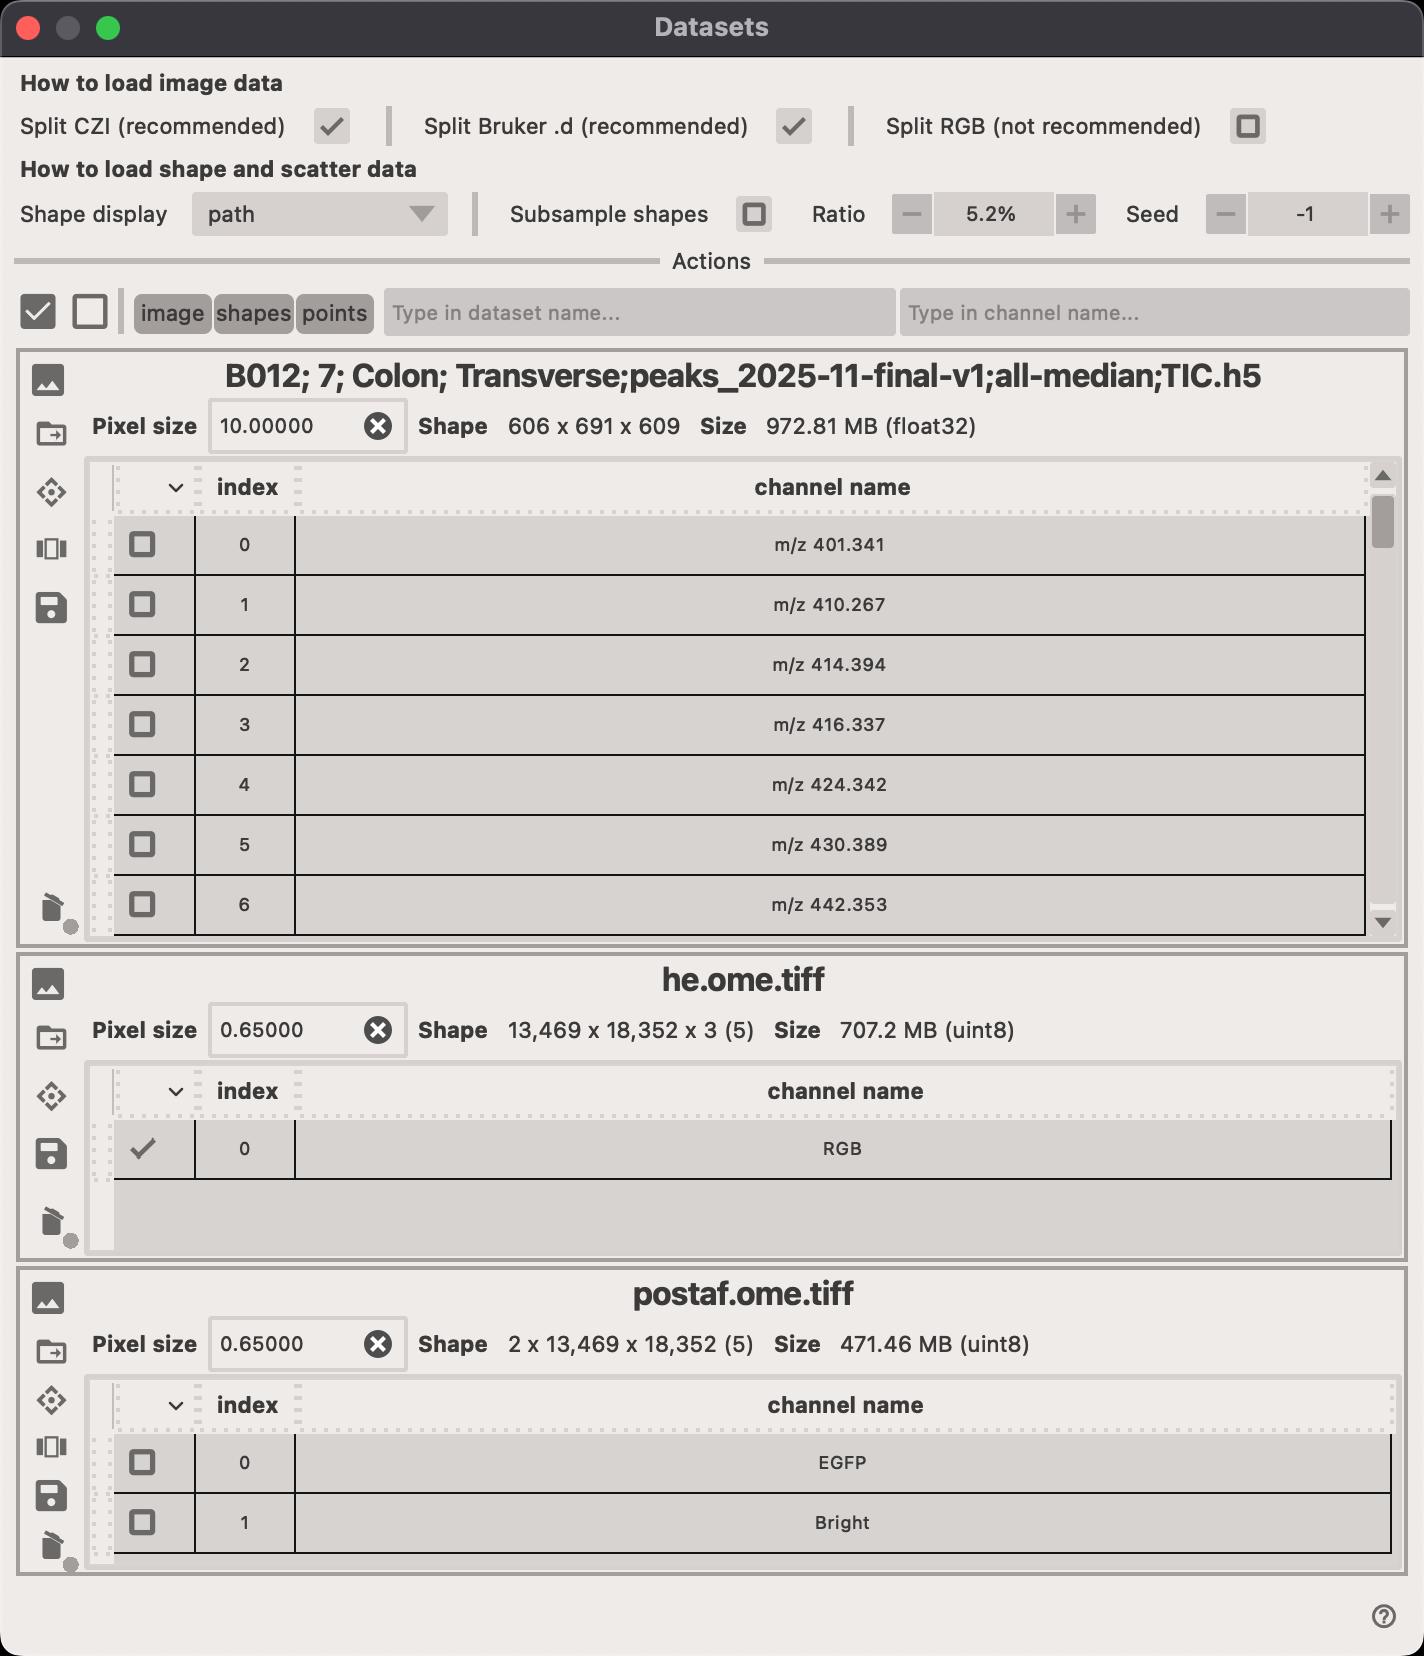
- Click on the to delete the entire dataset (all channels).
- Click on the to select the transformation that should be applied to the dataset.
- Click on the to open a new popup window where you can select which channels should be displayed.
Image transformation
As implied above, you might have images that need to be transformed to a common coordinate system. Often, when we work with multiple imaging modalities, we don't export all images to the same coordinate system. For instance, you might have a histology image (H&E or PAS stain), and an IMS image which is often of much lower resolution and much smaller in size. In such cases, we would manually (or otherwise) register the images together and save the transformation information the i2r.json or i2r.toml file using the register app.
Then, when you want to display those different images together in the viewer app, you would need to apply the transformation to the images that are not in the common coordinate system.
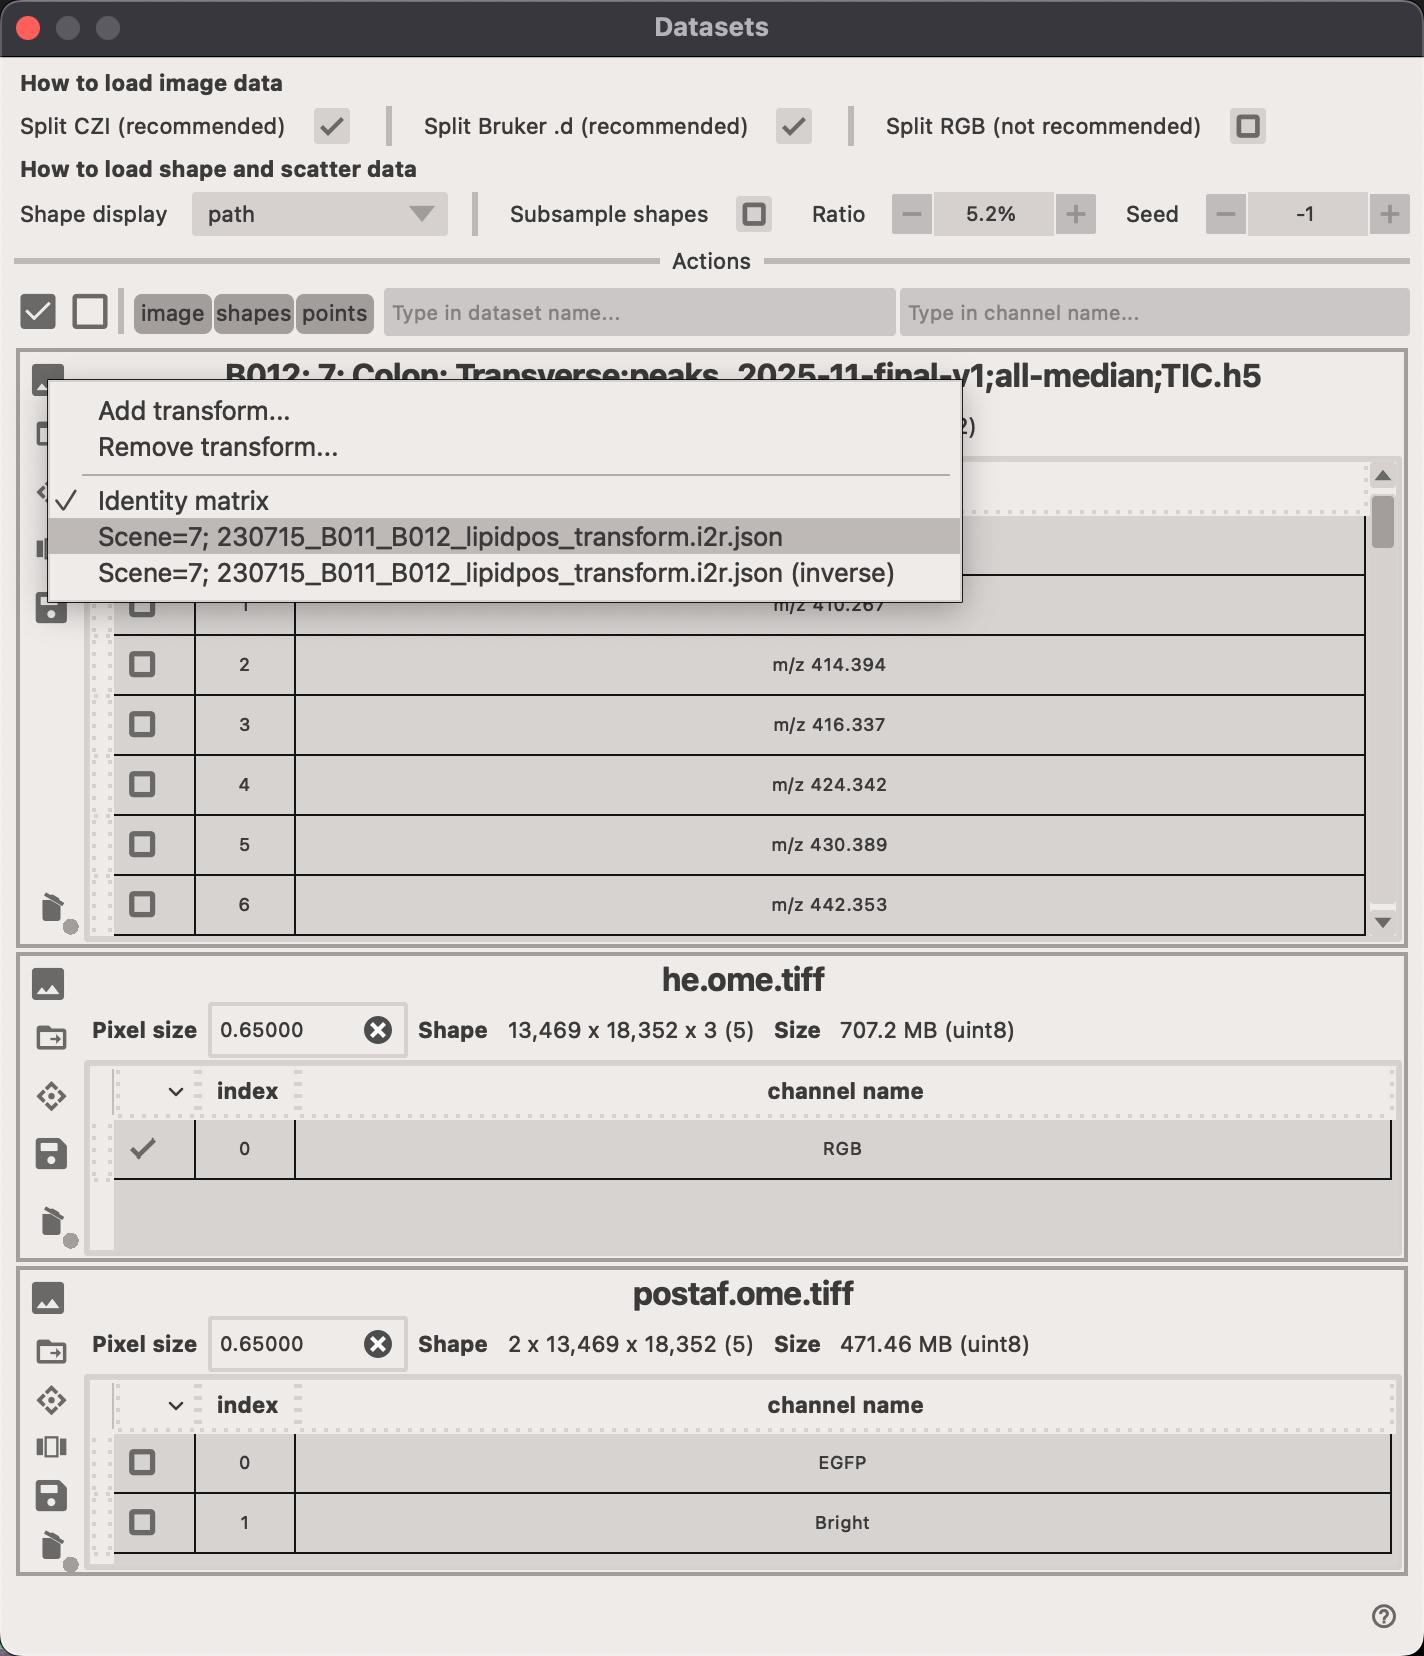
Here are the steps to apply a transformation to an image:
- Click on the
Select channels...button to open the popup window. - Click on the to open the transformation menu popup.
- If you've not
dragged-and-droppedthei2r.jsonori2r.tomlfile yet, you can do so or click on theAddoption in the menu to load it. - Select the transformation from the list of available options.
- The underlying layers (images or otherwise) will be immediately transformed to the new coordinate system.

Warning
If the pixel size/resolution information is incorrect, you might get unexpected results.
Scalebar
You can easily display scalebar on your image by clicking on the Tools > Show scale bar controls... or Ctrl+S on your keyboard.
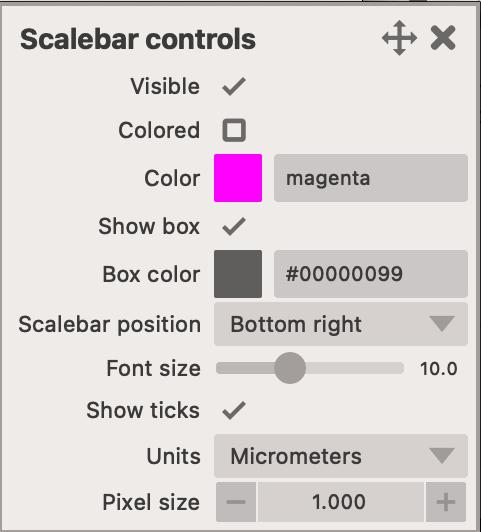
- You can change its location (any of the four corners of the image).
- You can change the units (No units, micrometers or pixels.)
Note
For the 'micrometers' units to work properly, you must also specify the pixel size in the image table.