Registration App
This is a simple image registration tool that can be used instead of napari-imsmicrolink.
You should use the napari-wsireg app for automatically registering your microscopy images together, but you can use image2registration to co-register your IMS data with the postIMS-AF.
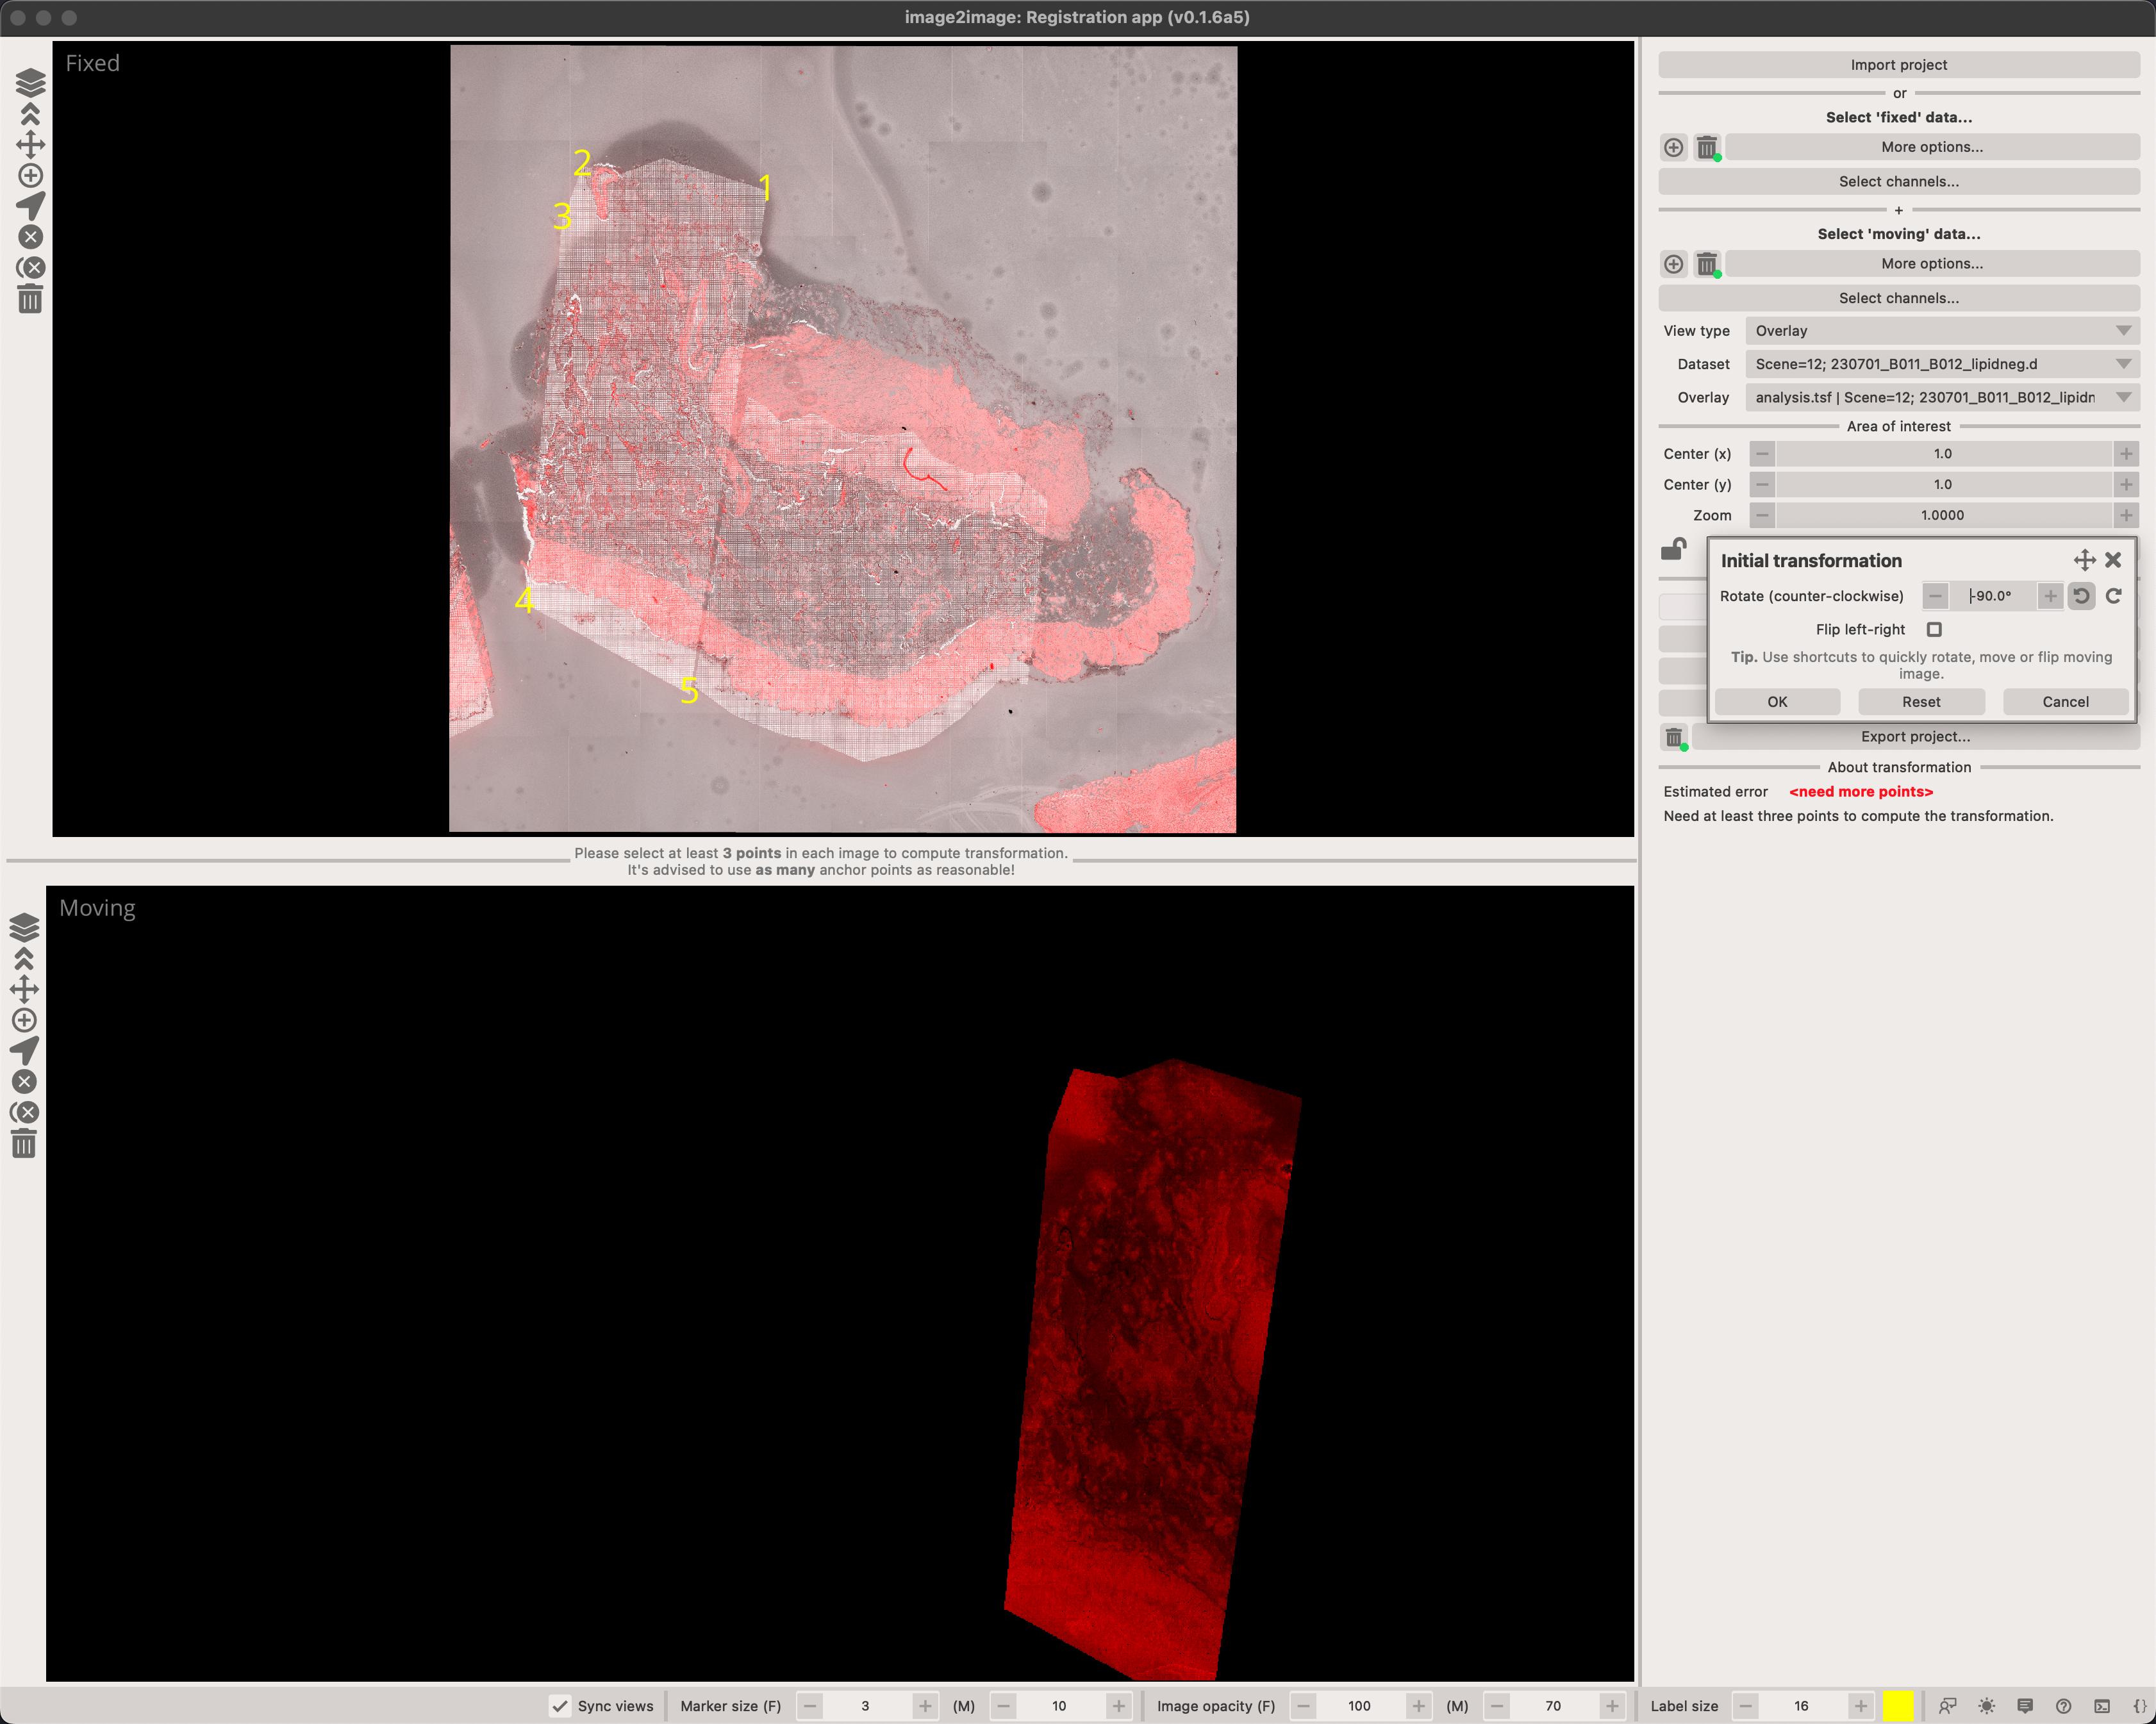
This app defines the Fixed and Moving modalities. As the names suggest, the Fixed modality should normally represent the microscopy modality to which you want to co-register your IMS data. Consequently, the Moving modality is the IMS dataset.
Obtaining transformation matrix
- Select your
Fixedimage by clicking on the button. This will let you select images to load. You can alternatively drag-and-drop images into the canvas. - Select the channels you want to immediately display. All channels will be loaded but not all displayed if you've unselected some.
- Repeat this for the
Movingmodality. - Click on the icon in the toolbar on the left-hand side (or click 2 on your keyboard to activate the
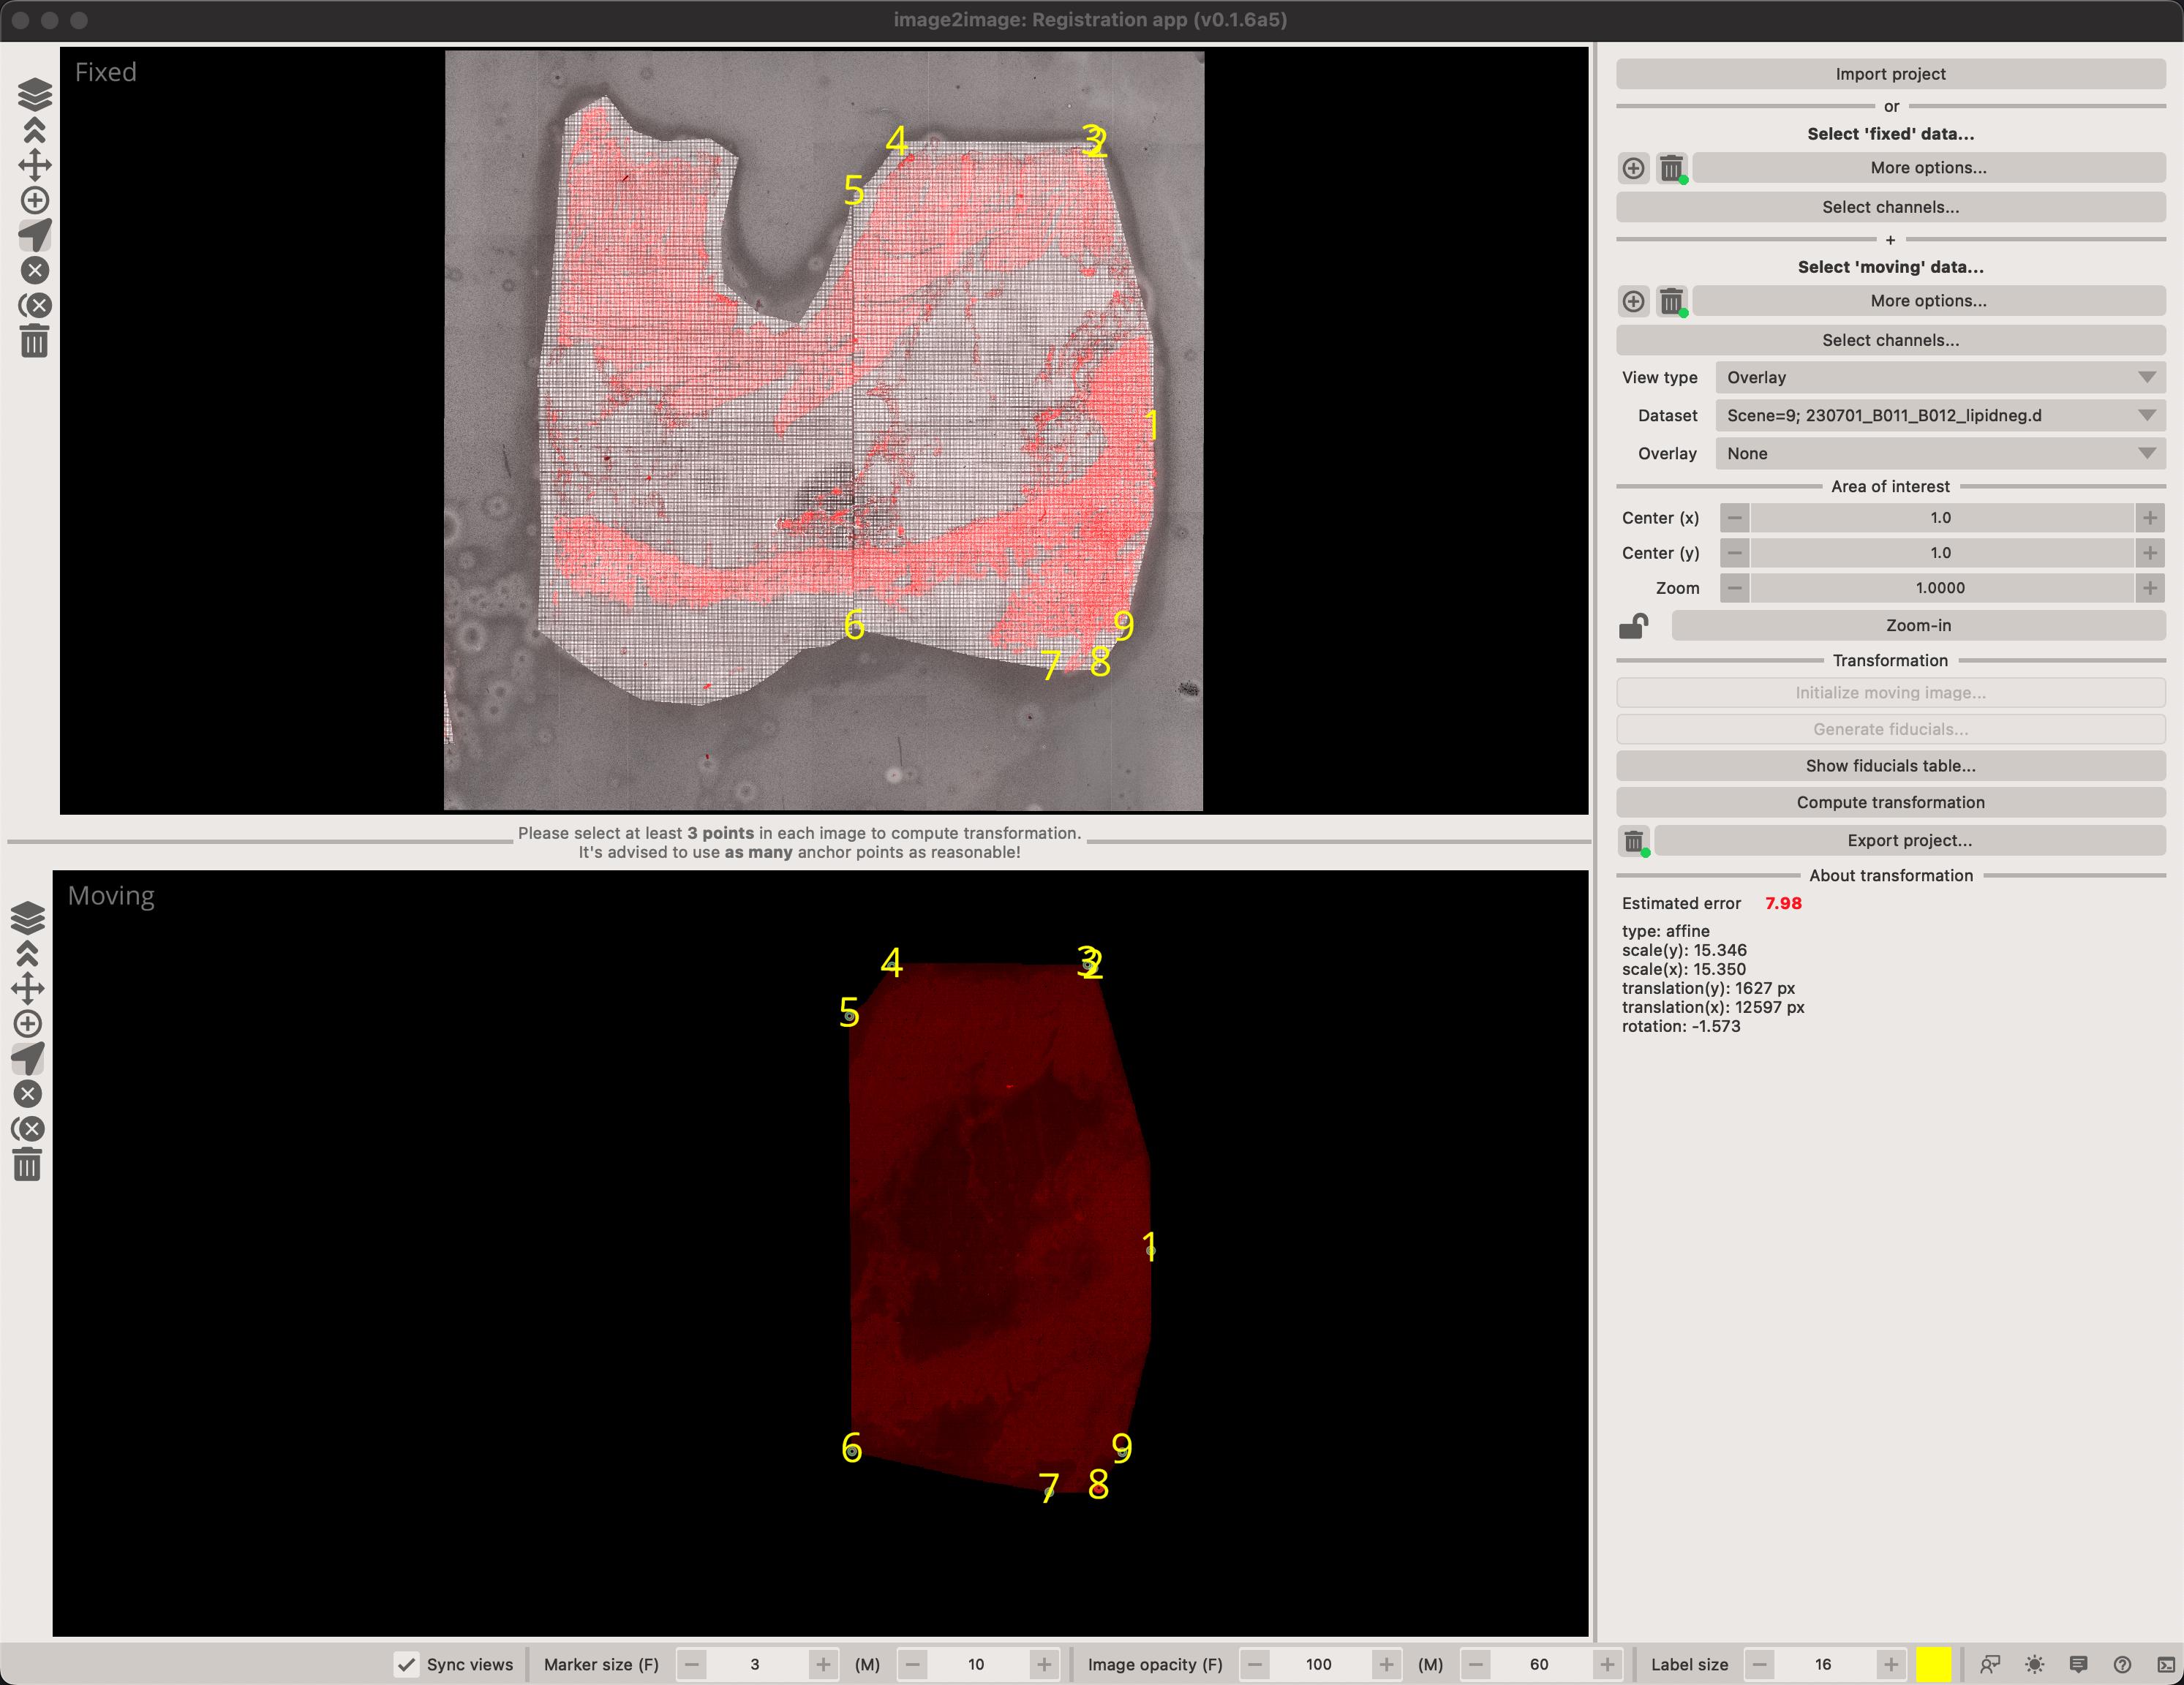
addmode). - Select at least 4 points in each image to estimate transformation matrix. After that, you can click in either image and the other will be predicted.
- Once you are happy with your results. Save them as the
i2r.jsonformat which can be used in the viewer app or to transform images and masks.
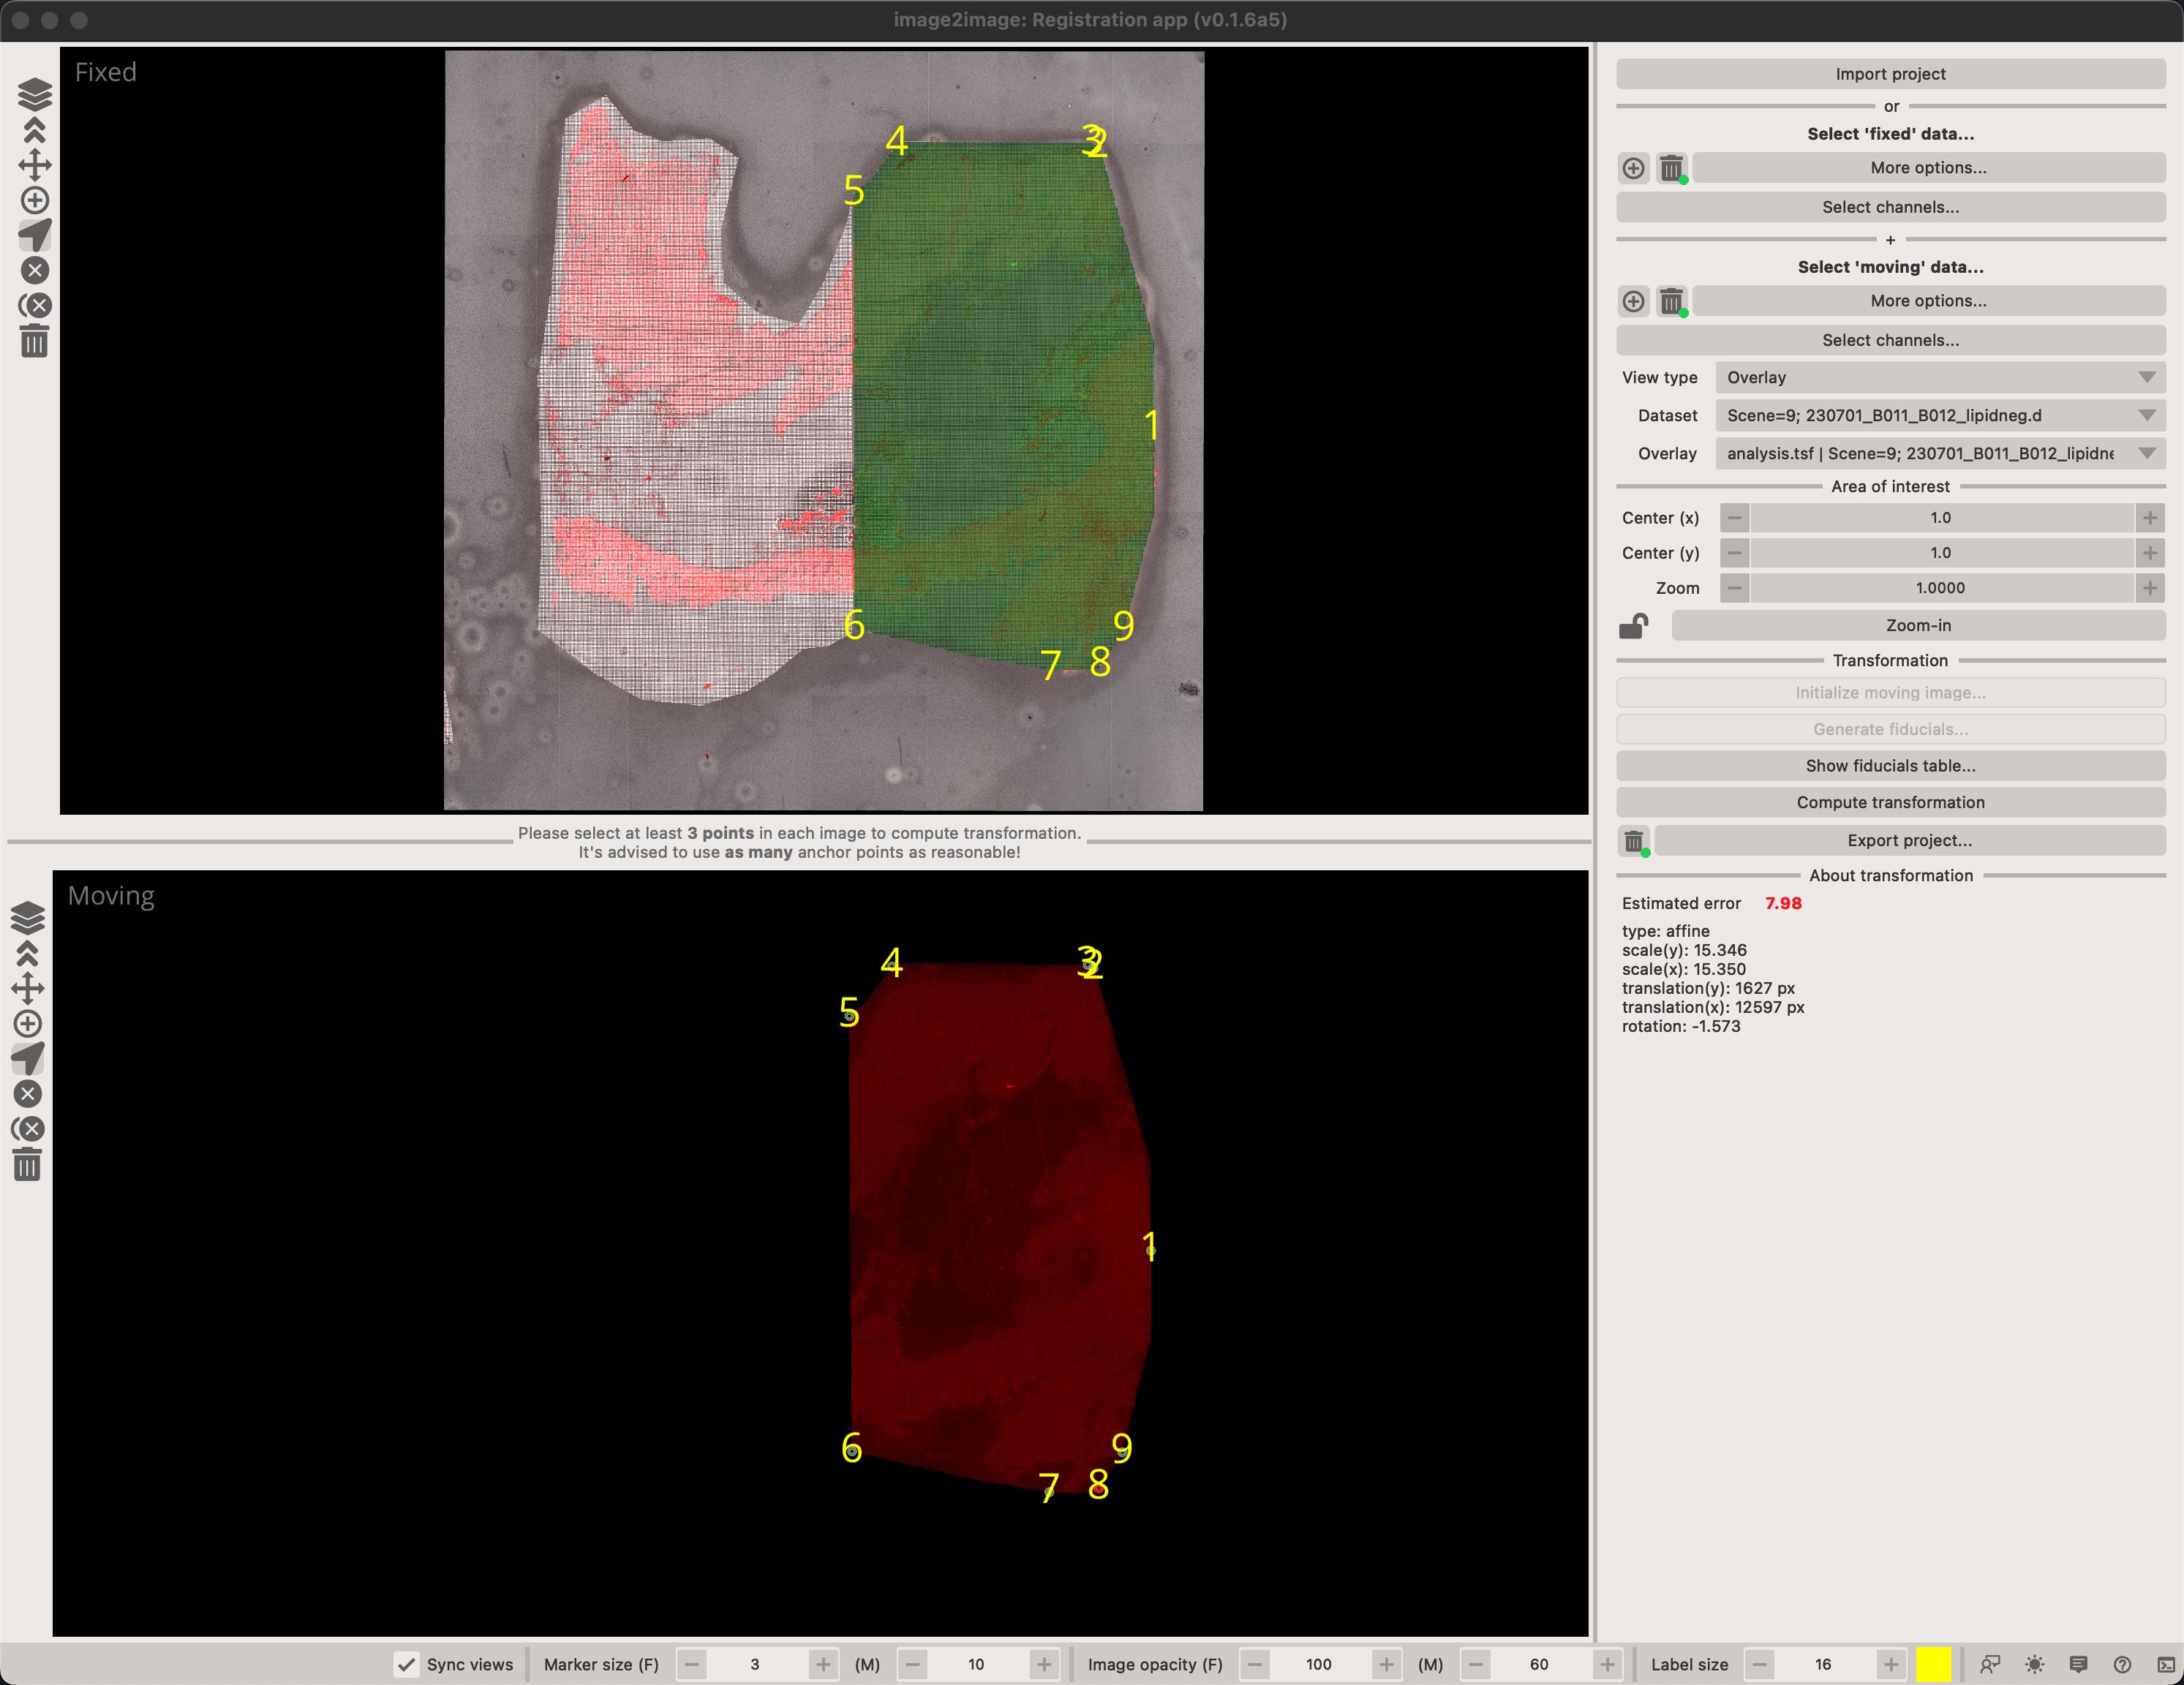
You can overlay any of the moving images on the fixed image by selecting an image in the Overlay combobox. You can also toggle the view type between Random image (where we fill-in the image with random values) or Overlay which directly represents the co-registered image.
Prediction
The registration app only requires 4 points to estimate transformation matrix. Once four points have been added to both views, it will start to predict where points might be. For instance, if you add a new point in the Fixed viewer, it will automatically place a point in the Moving viewer. You can then take a look if you are happy with the position and move it to where it should be. The more points you have, the better the predicted transformation will be.
Compatibility with napari-imsmicrolink
If you have previous napari-imsmicrolink registrations, you can load them into image2register by clicking on the Import project button. The output of the napari-imsmicrolink plugin contains information about what images were used, the pixel size and fiducial markers but it is not guaranteed to work with image2register app. The reason for this is that napari-imsmicrolink permits users to rotate and pad their images, however, this information is not retained in the configuration file so we cannot automatically determine this.
Automatic fiducial marker generation
Since version 0.1.7 it is possible to automatically generate fiducial markers. This is useful when you have a large number of images and you want to quickly establish the transformation matrix between them. To do this, follow this simple guide.
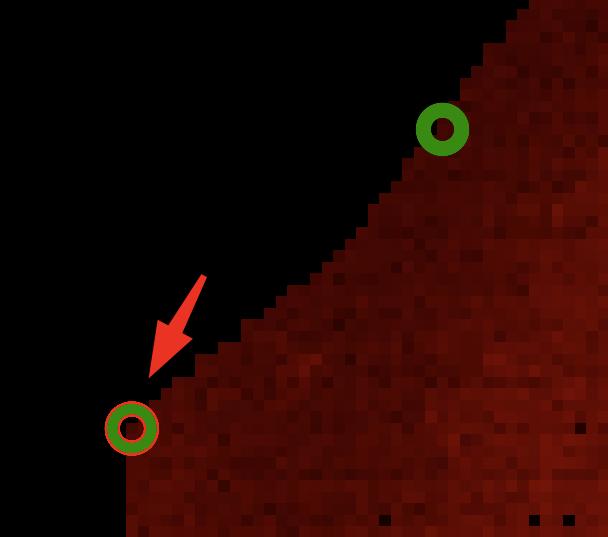
Point that should be found in the `moving` image (right).
- (optional) Click on the
Initialize moving image...button to rotate and flip the moving image. This might not be necessary it's sometimes necessary to pre-orient the image if the microscopy image is rotated or flipped. - Click on the
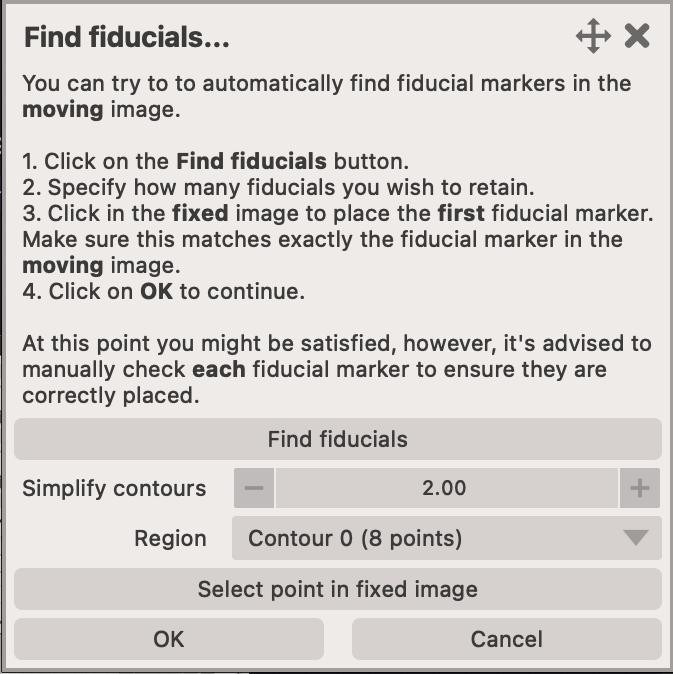
Generate fiducialsbutton. This will open a new dialog where you can automatically detect fiducial markers in themovingimage. - You can easily adjust the number of detected fiducials by adjusting the
Simplify contoursslider. This will remove points that are too close to each other. The smaller the value, the more points will be retained. - Once you are satisified with the number of detected markers, click on the
Select point in the fixed imagebutton. This will activate theaddmode on a temporary points layer in thefixedviewer. You then need to find the corresponding point in thefixedimage, and mark it. - Once the point was found in the
fixedviewer, click on theOKbutton and the points visible in themovingviewer (found) will be added to thefixedviewer. - You now will want to toggle between all the automatically added points and adjust their position to improve the alignment. You can do this very rapidly by clicking on the 3 key on your keyboard (which activates the
movemode), and then A and D keys to toggle between points in both images.
Warning
This option is disabled if there are any points in the moving viewer. You will need to remove them to enable the automatic fiducial marker generation.
Dialogs and widgets
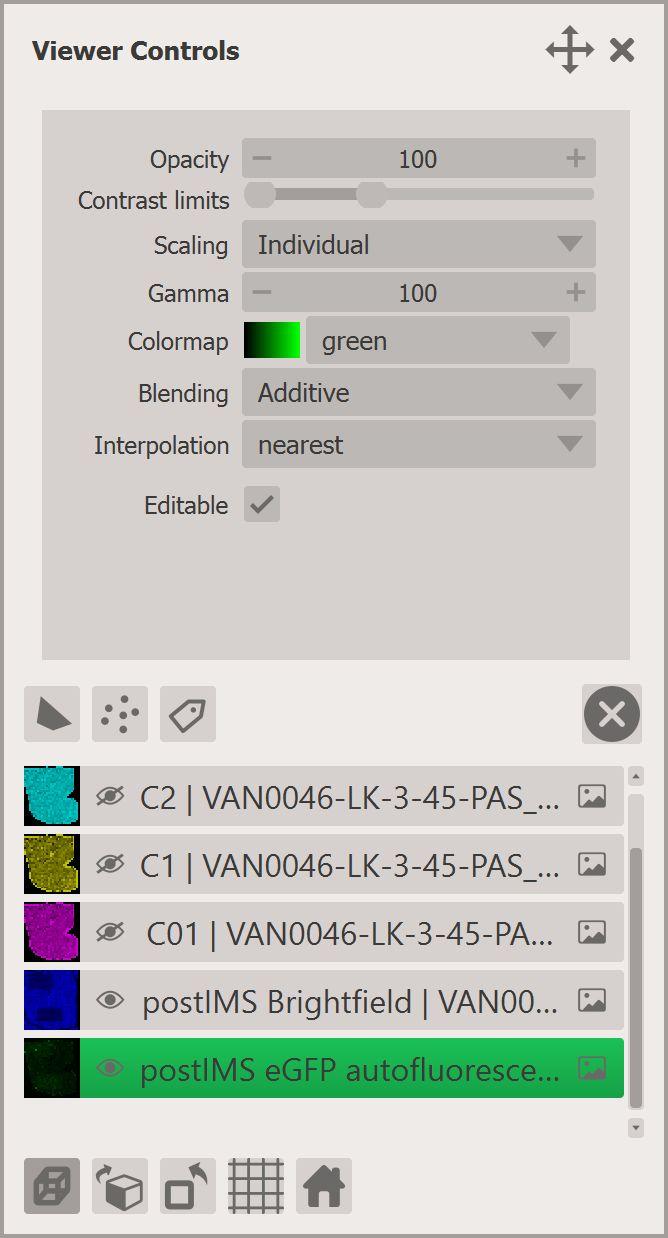
Viewer toolbar
To the left of each canvas there is a toolbar with a number of widgets.
- - this button opens up
Layer controlsfor this particular view. See layer-controls - - this button moves the points layer to the top. This is sometimes necessary. Use if you can't see the points you are adding!
- - activate the
zoommode in the viewer. You can also activate it by pressing 1 on your keyboard or temporarily enable it by pressing Space on your keyboard if any of the other modes is active. - - activate the
addmode in the viewer. This mode let's you add fiducial markers to the image. You can also activate it by pressing 2 on your keyboard. - - activate the
movemode in the viewer. This mode lets you select and move the fiducial markers to a new position. Each time you do this, a new transformation matrix is computed. You can also activate it by pressing 3 on your keyboard. - - remove the last added point.
- - remove all currently selected points (you will be asked to confirm).
- - remove all points (you will be asked to confirm).
Image selection
Click on the Select channels... button to open the popup window. The window shows a unified way of selecting which datasets and channels should be displayed, how the images (or other modalities) should be transform to the common coordinate system.
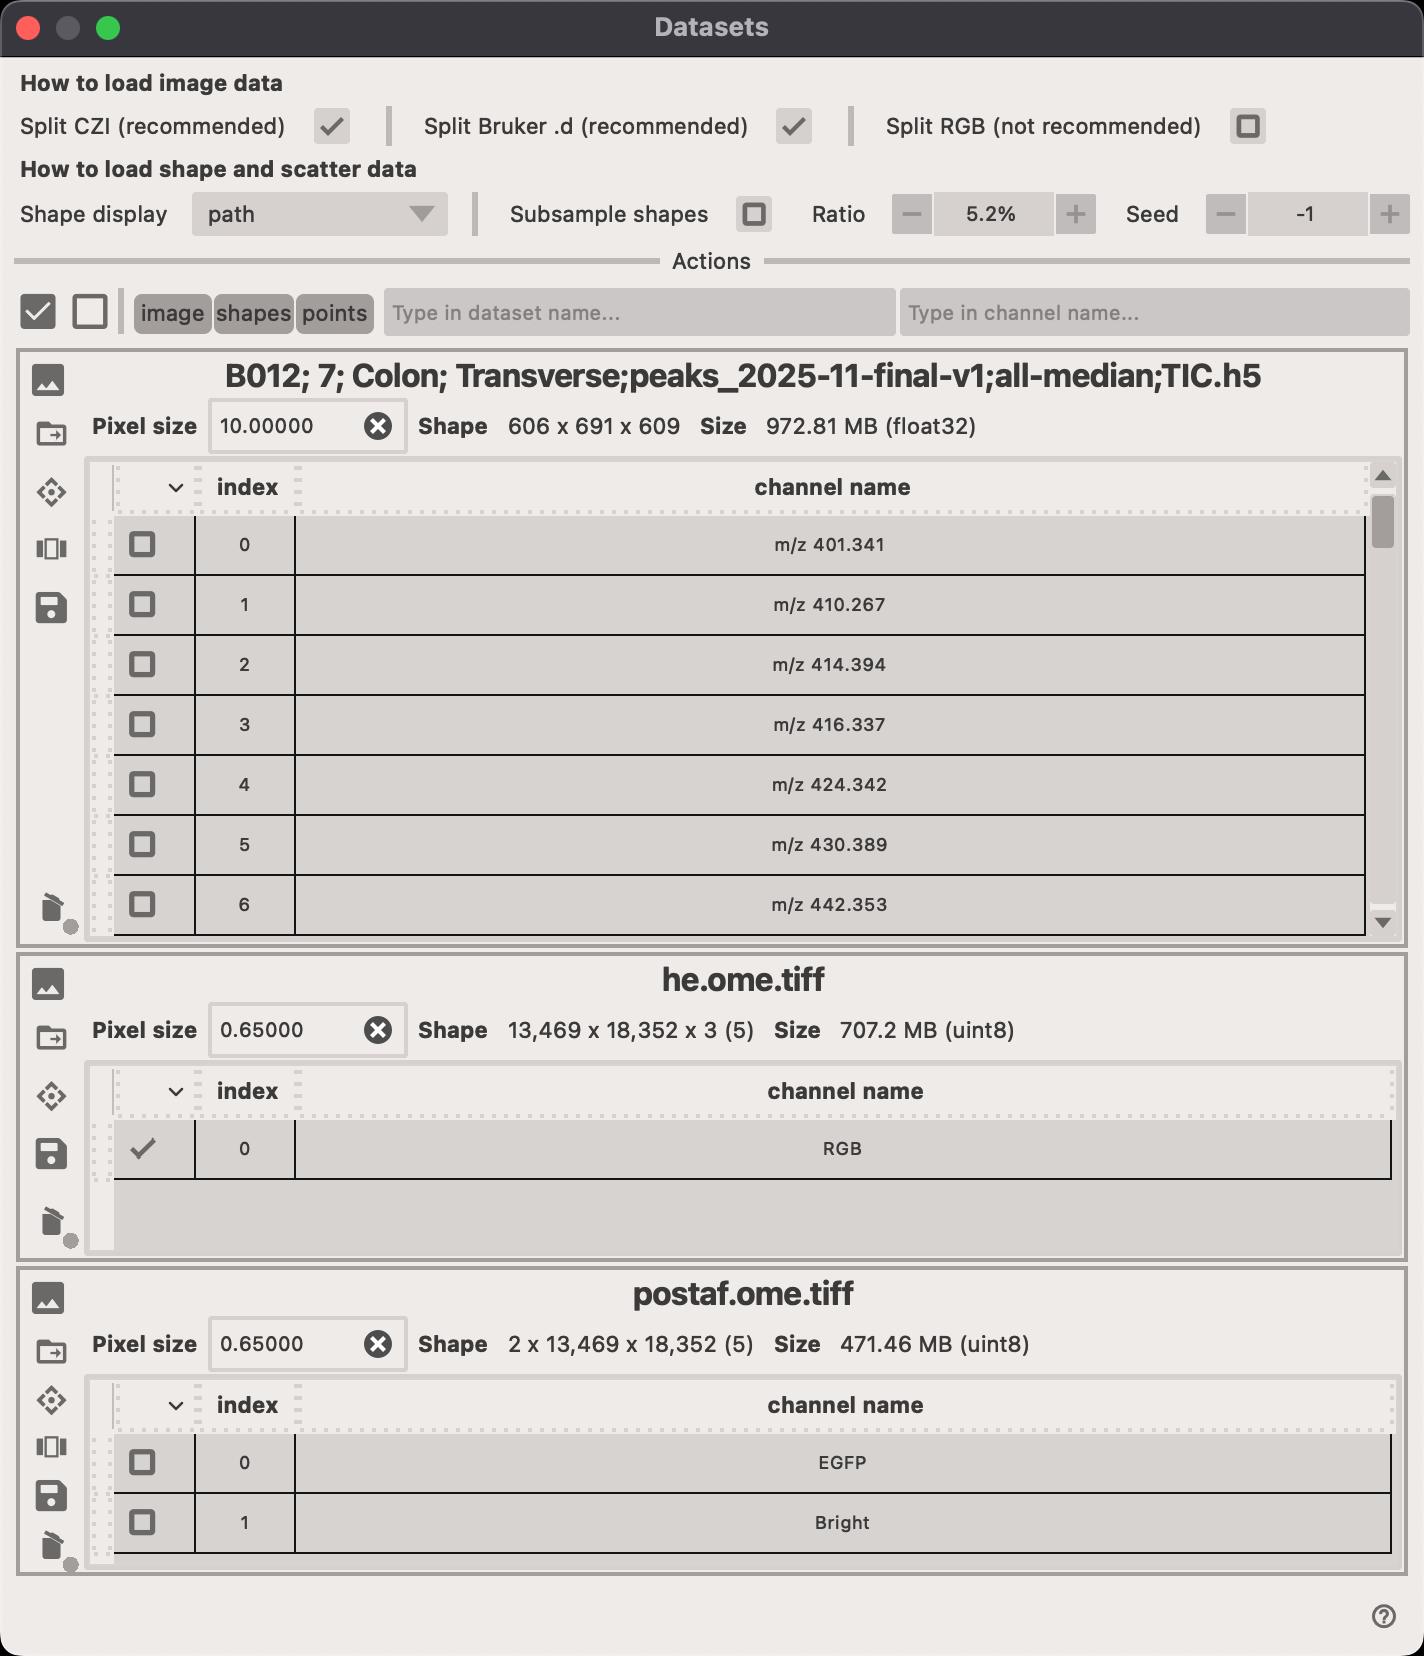
- Click on the to delete the entire dataset (all channels).
- Click on the to select the transformation that should be applied to the dataset.
- Click on the to open a new popup window where you can select which channels should be displayed.
Initial transformation
In some situations, you might have a microscopy image that is rotated or flipped. While it's possible to manually add points in the correct order, it's far easier to 'initialize' the transformation matrix by clicking on the Initialize moving image... button. This opens a dialog which let's you rotate and flip the moving image.
Fiducials table
Click on the Show fiducials table... button to open the popup window.
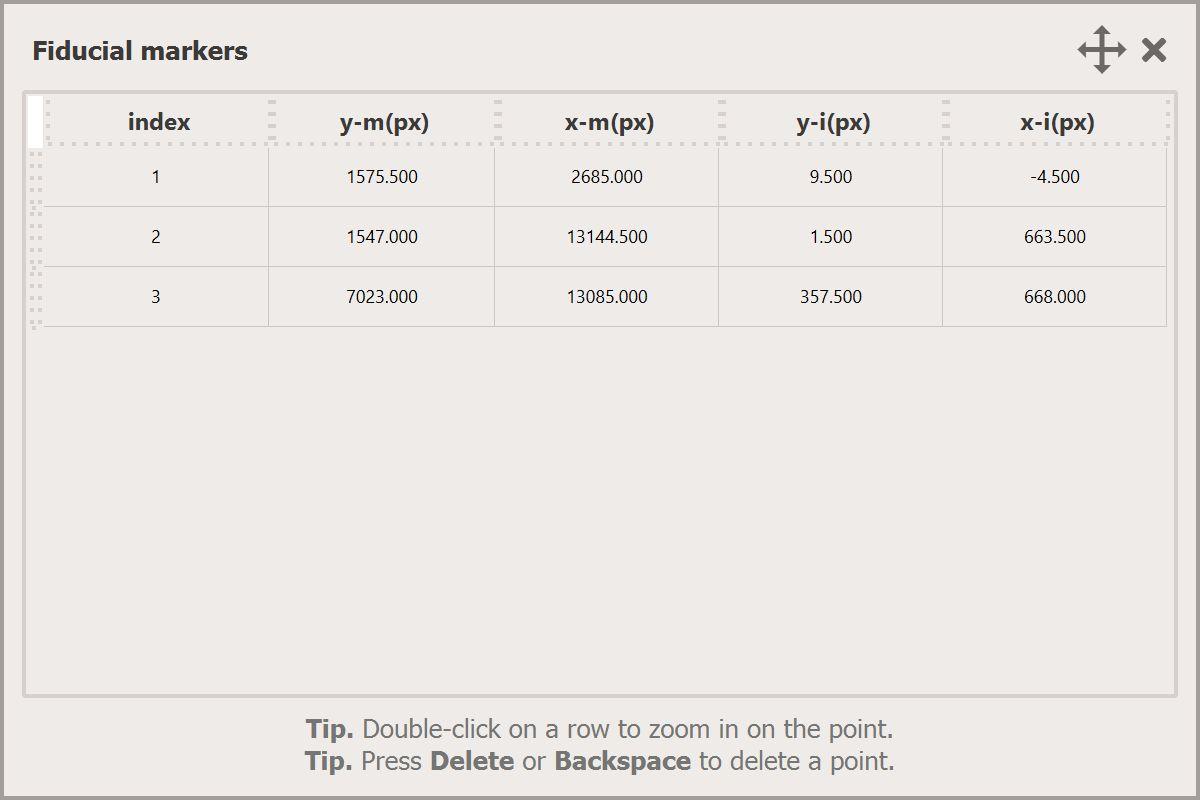
- Double-click with the Left Button on a row to select a pair of points and zoom-in on them in each canvas. You can then easily adjust their position to improve the alignment of layers.
- Press Del or Backspace on your keyboard while selecting a point to remove it from the table.
Warning
Once point is deleted from the table, it cannot be recovered.