Valis app
This app performs Valis registration. It is an excellent whole-slide registration workflow that performs better in non-linear transformations than the elastix app.
Simplified workflow (see below for more information)
- Load the images you wish to co-register.
- Adjust their names, parameters.
- Establish the registration paths.
- Adjust the export options.
- Execute the registration.
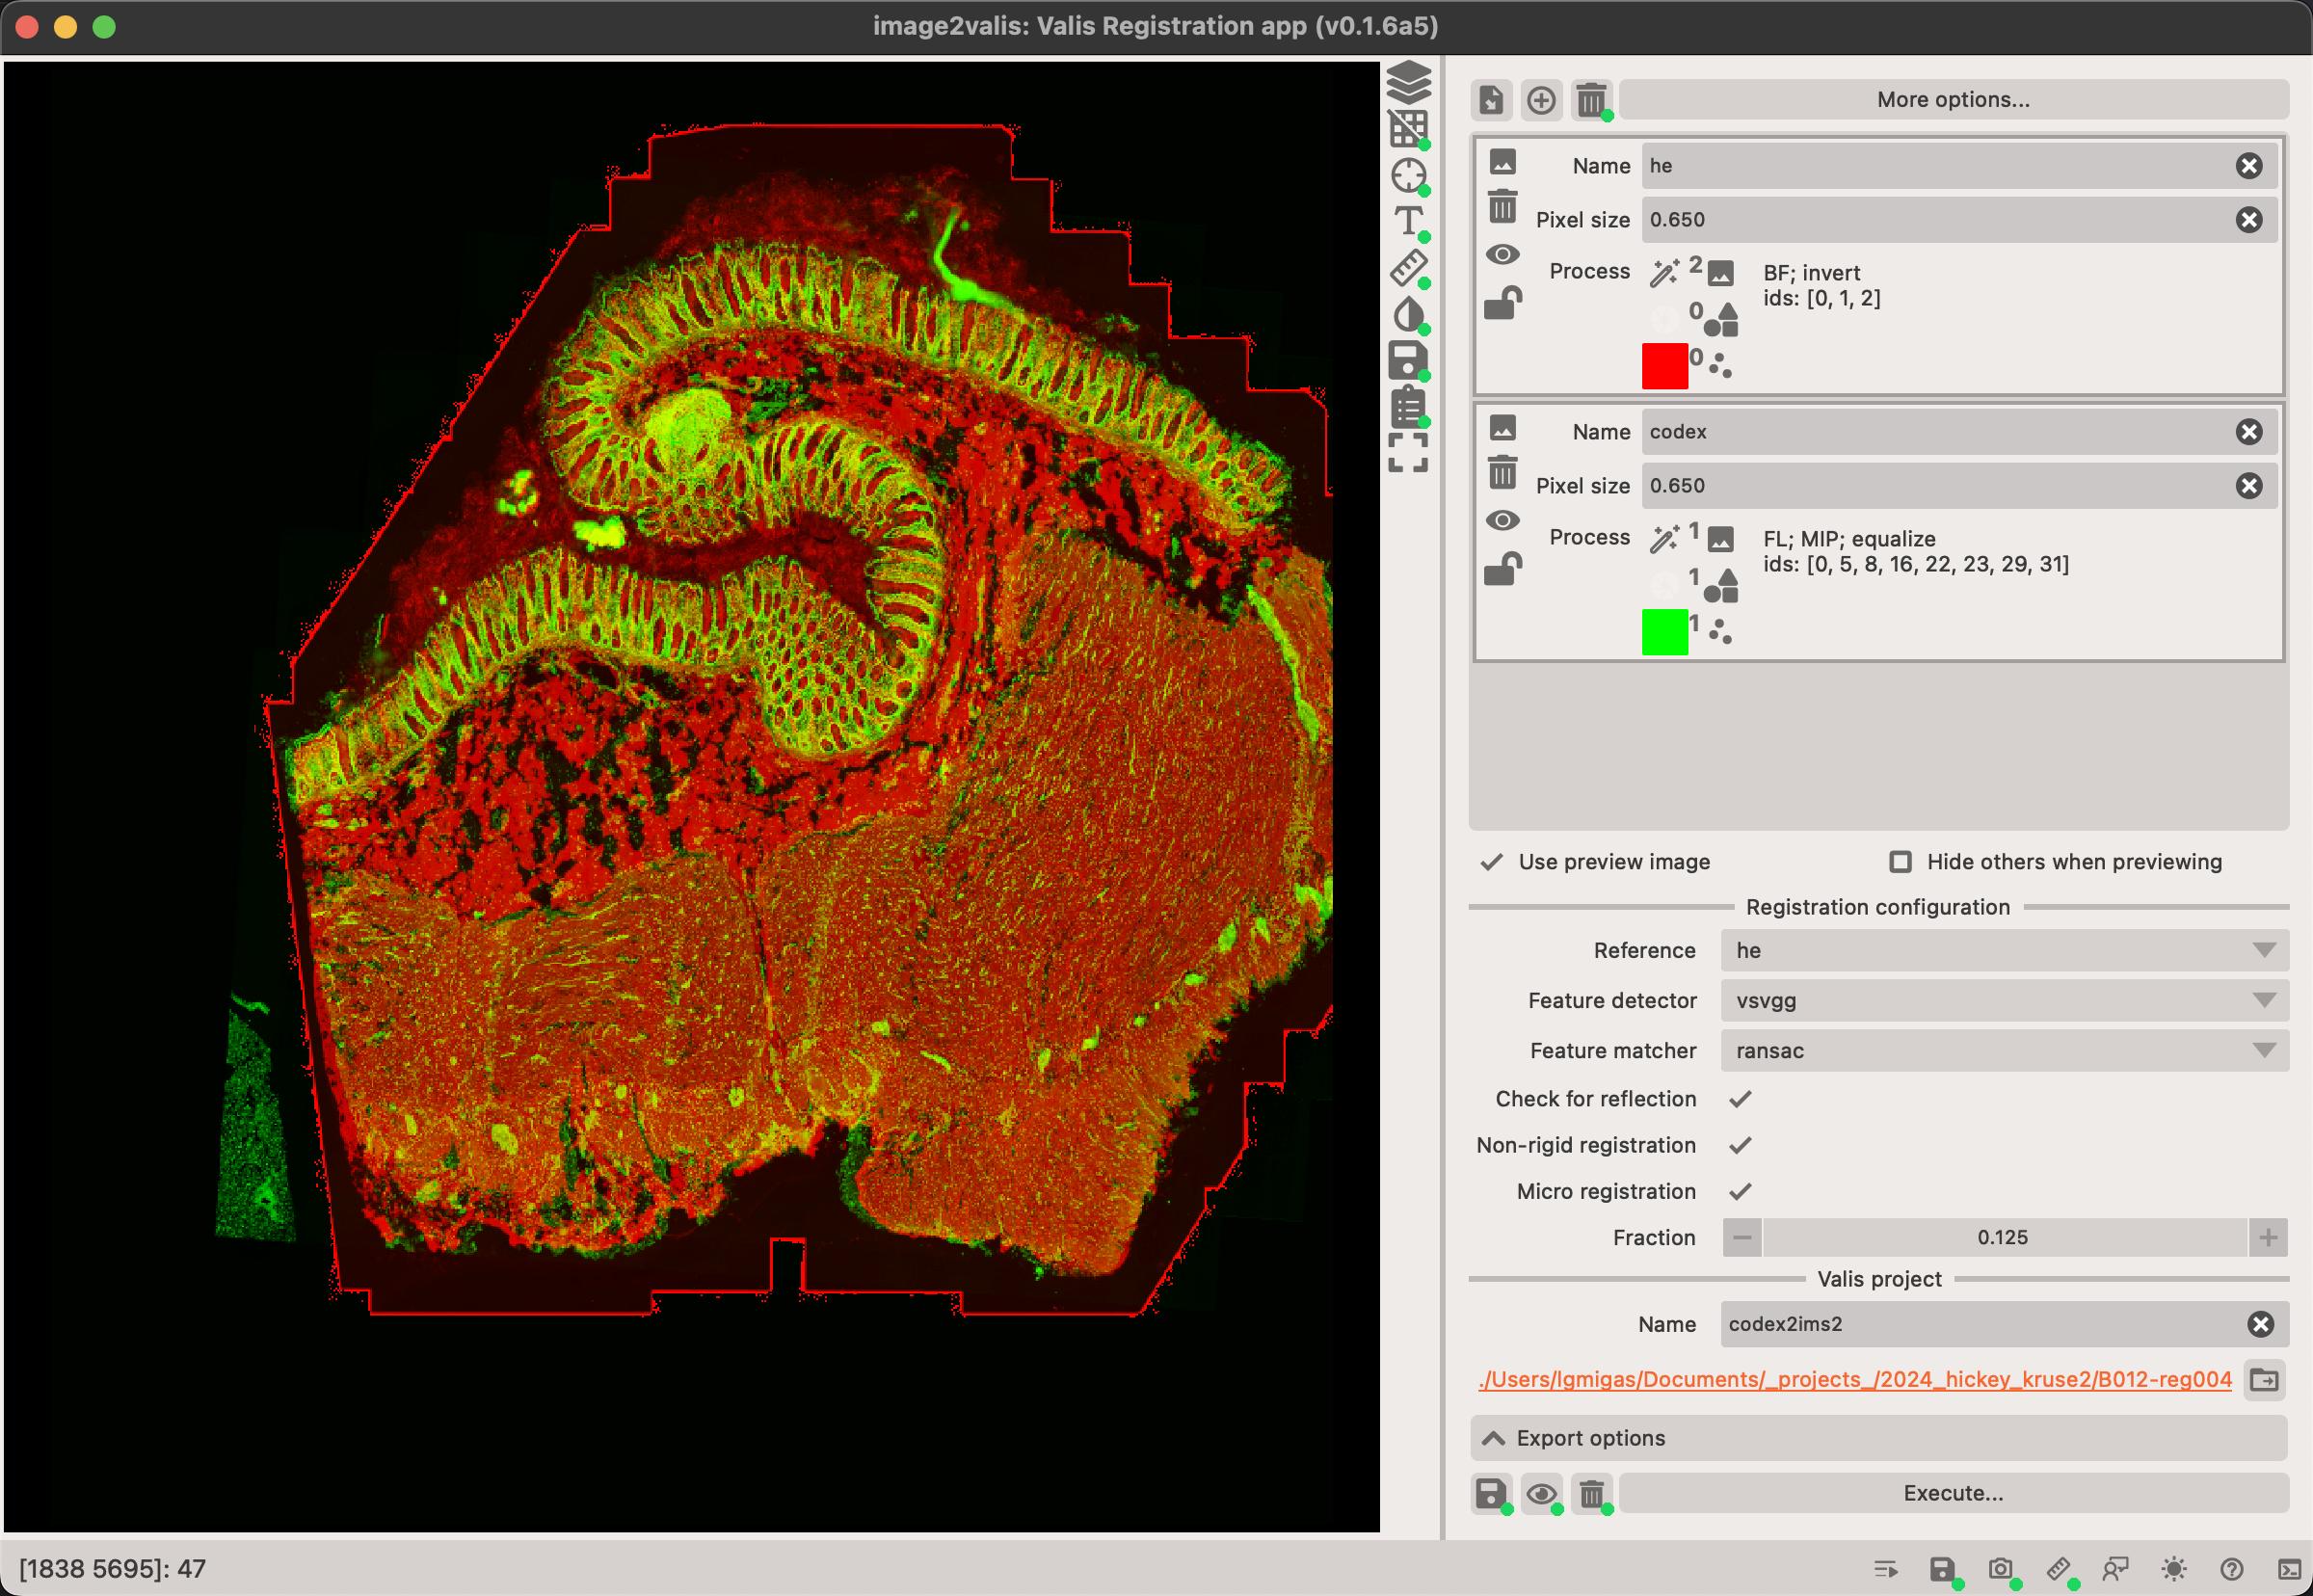
Live preview
You can immediately preview how your images will look like after before registration. This is extremely useful since it's important that images used for registration highlight their features.
To enable this, make sure to click on the Use preview image checkbox.
Pre-processing
In the top-right corner of the app, you can find the list of image modalities that will be registered. You can adjust the pre-processing parameters for each modality by clicking on the widget or on the Pre-process... button.
The widget also allows you to adjust the name of the modality, spatial resolution (if it was read incorrectly from the file metadata) and the color of the image.
There are a number of pre-processing parameters that can be adjusted to improve the registration process.
- Intensity - adjusts how the intensity of the image is transformed.
- Multi-channel images must be turned into a single-channel image, usually done by using
maximum intensity projection. - You can improve the contrast of the image channels by using
histogram equalizationorcontrast enhancement(or both). - if your image is
light or dark background(e.g. H&E) then you mustinvertthe intensities
- Multi-channel images must be turned into a single-channel image, usually done by using
Registration options
Valis works very differently to elastix in that it doesn't require you to specify the registration paths. Instead it uses automatically detected fiducial markers between pairs of images to establish the image transformations.
It normally works in three steps: - low-resolution rigid transformation - this is to roughtly align the images to each other - low-resolution non-linear transformation - this is to refine the alignment - high-resolution non-linear transformation - this is to get the final alignment
You can specify a reference which will be the image to which all other images are registered to. If reference is left empty (or set to None) then then reference is automatically determined based on image similarity.
You can specify the Feature detector and Feature matcher to be used. These are the algorithms that will be used to detect and match the fiducial markers between images. The gms feature matcher often fails to work properly, so it's recommended to use ransac instead.
You can optioanlly disable the non-rigid and micro registration. These are the two last steps of the registration process. Disabling them will speed-up the registration process, but might result in a less accurate registration.
The fraction parameter controls what fraction of the image will be used for the final registration. If this value is large, it will take much longer, however, it might result in a better registration.

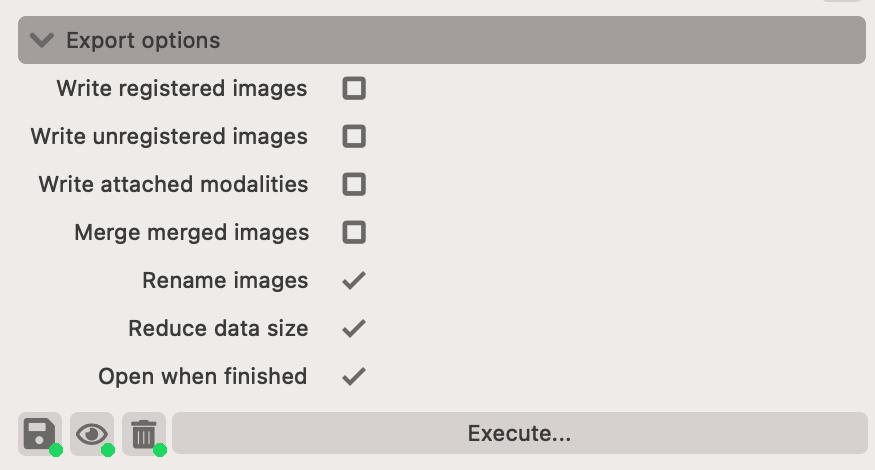
Export options
There are several export options available to you. This includes which images (or attachment modalities) should be transformed and exported.
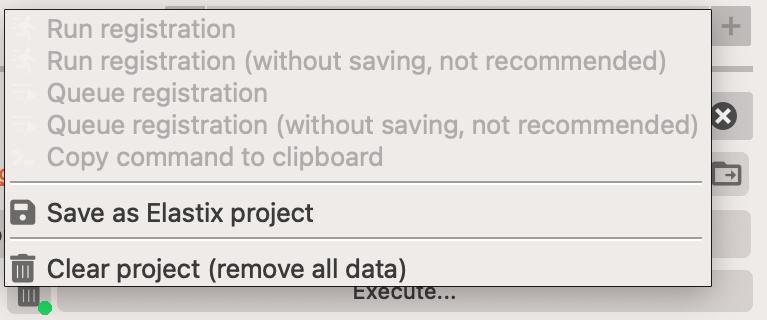
Execution
Registration can be executed directly in the app or via the command-line interface. The command-line interface is more powerful, as it permits batch processing, however, the in-app execution is more user-friendly.
Tasks that are being registered in the app, go the Tasks queue widget. You can access it from the statusbar at the bottom of the app.
