Elastix app
This app performs whole-slide image registration, similar to what napari-wsireg does. The main difference is that it has improved image pre-processing (which in turn improves the registration), easier creation of masks and cropping areas, utilizes a project structure and has much improved command-line interface.
Simplified workflow (see below for more information)
- Load the images you wish to co-register.
- Adjust their names, parameters.
- Establish the registration paths.
- Adjust the export options.
- Execute the registration.
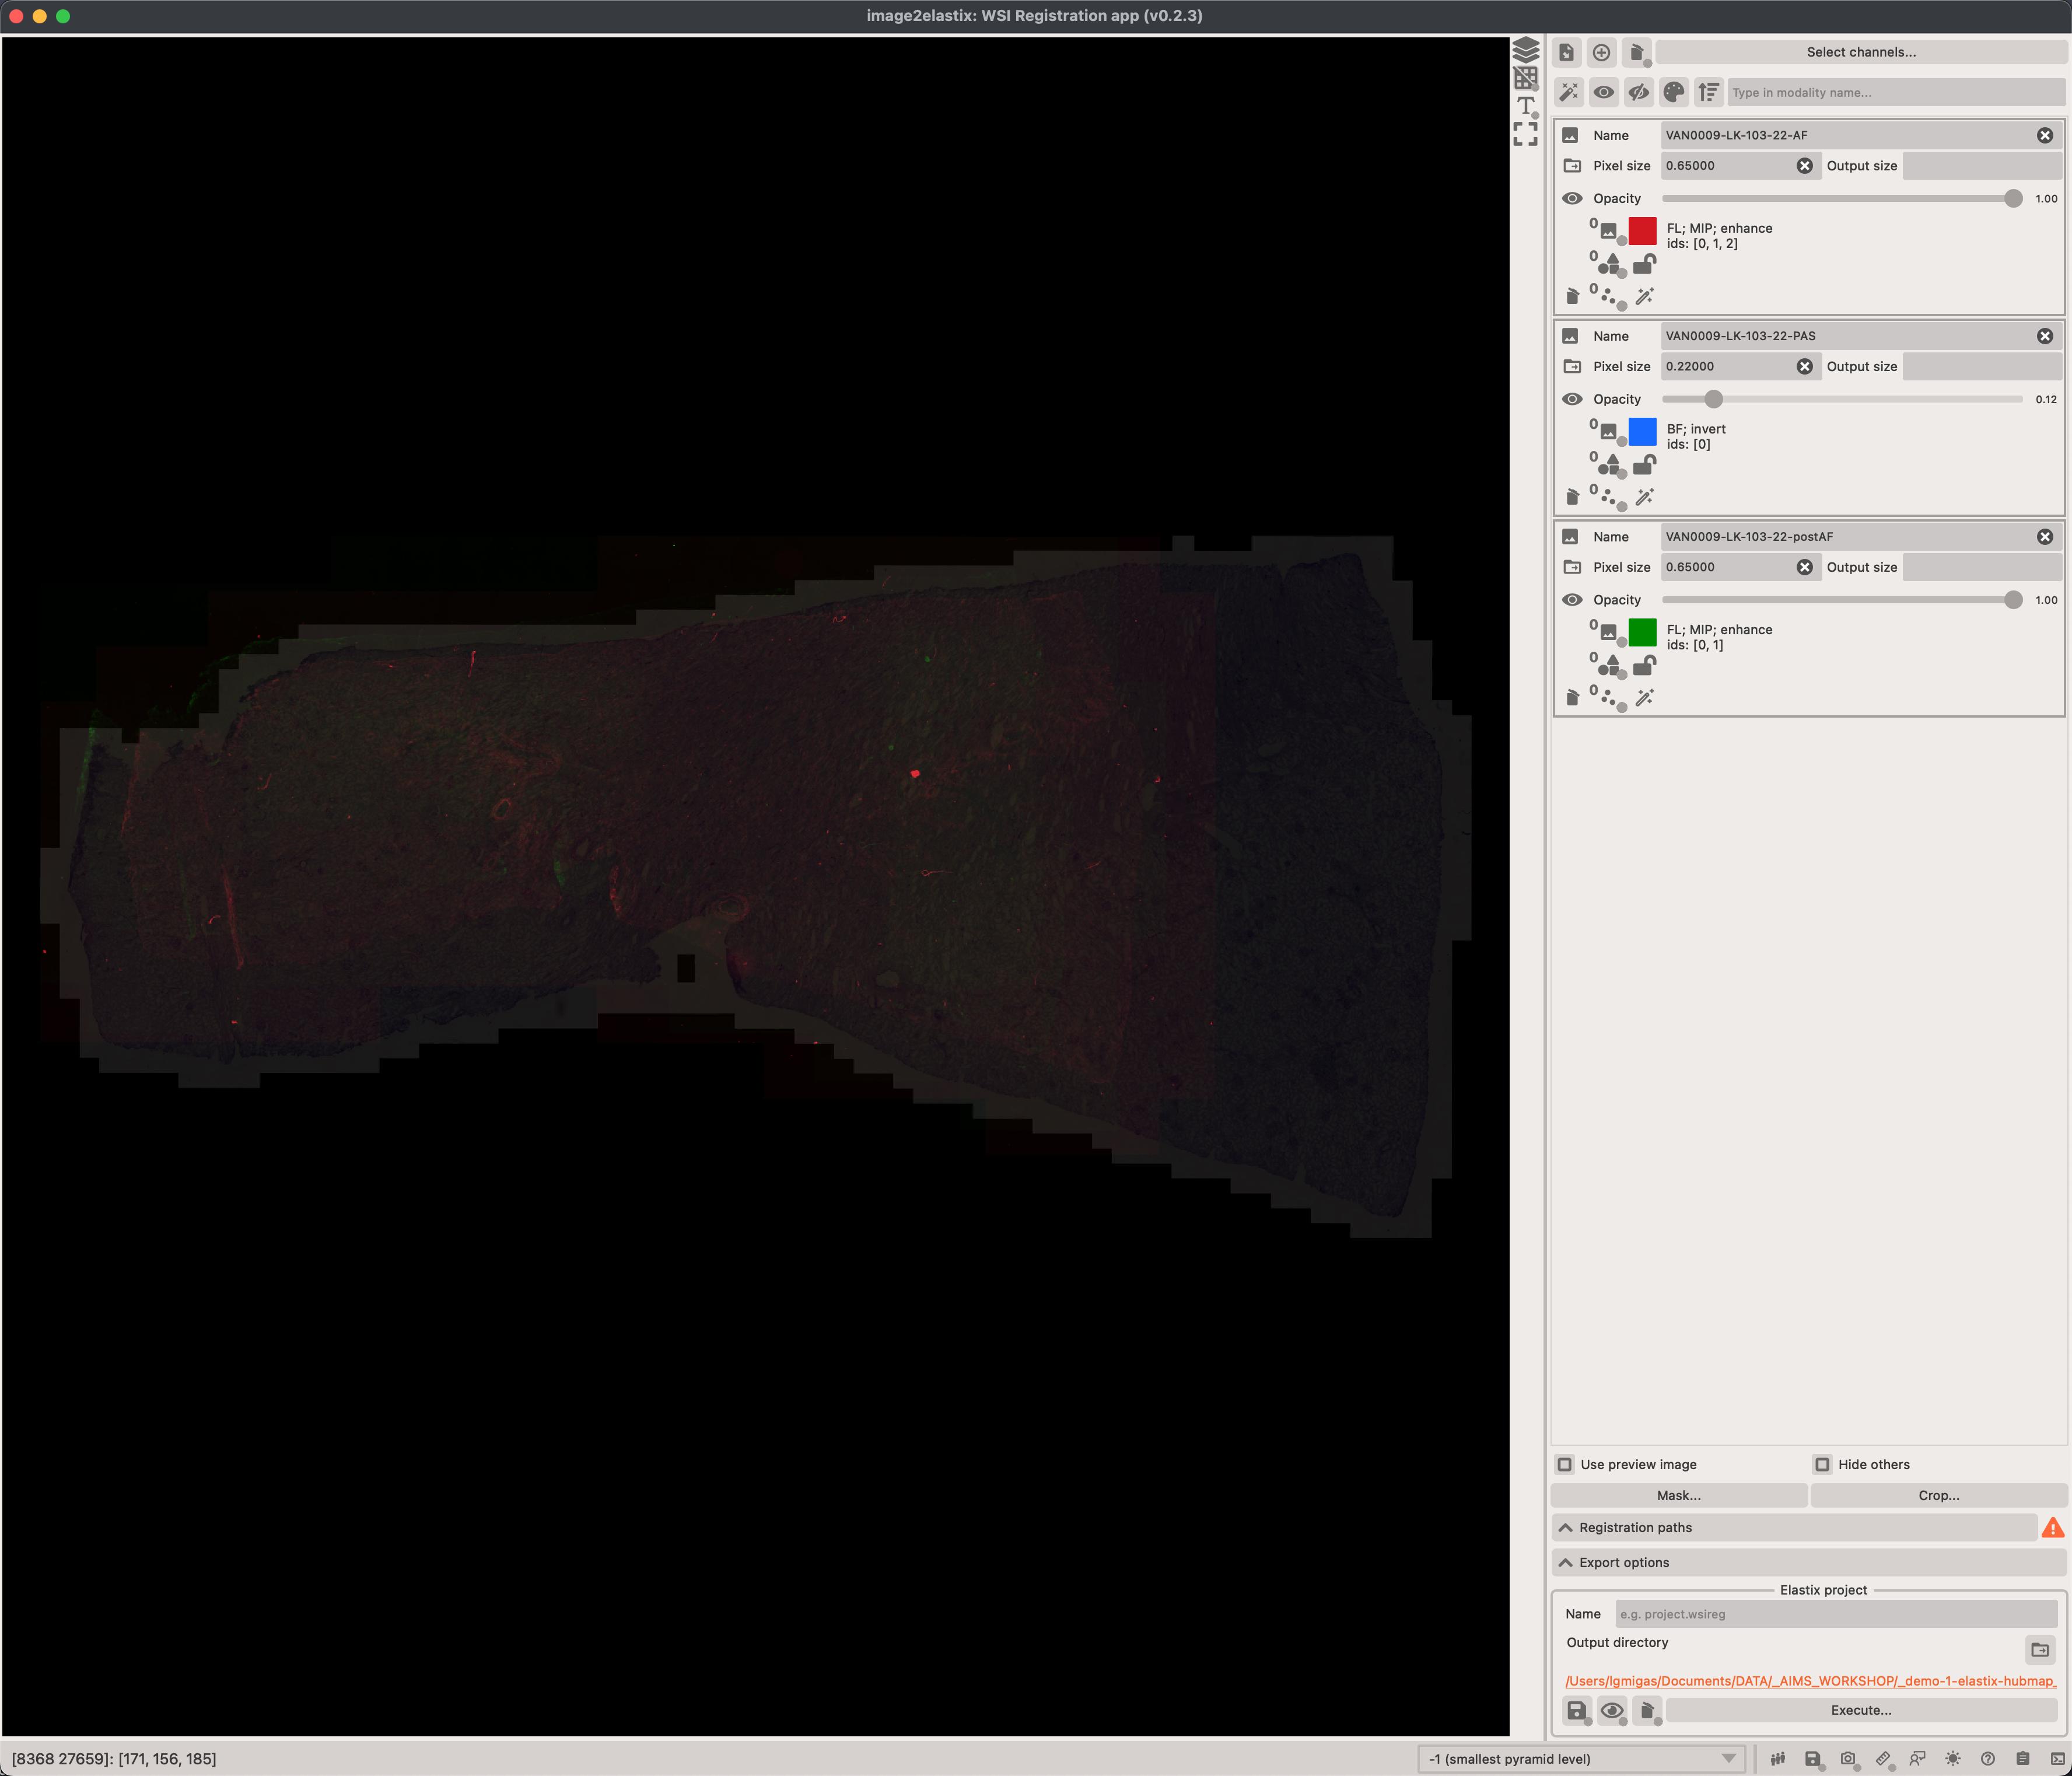
Live preview
You can immediately preview how your images will look like after before registration. This is extremely useful since it's important that images used for registration highlight their features.
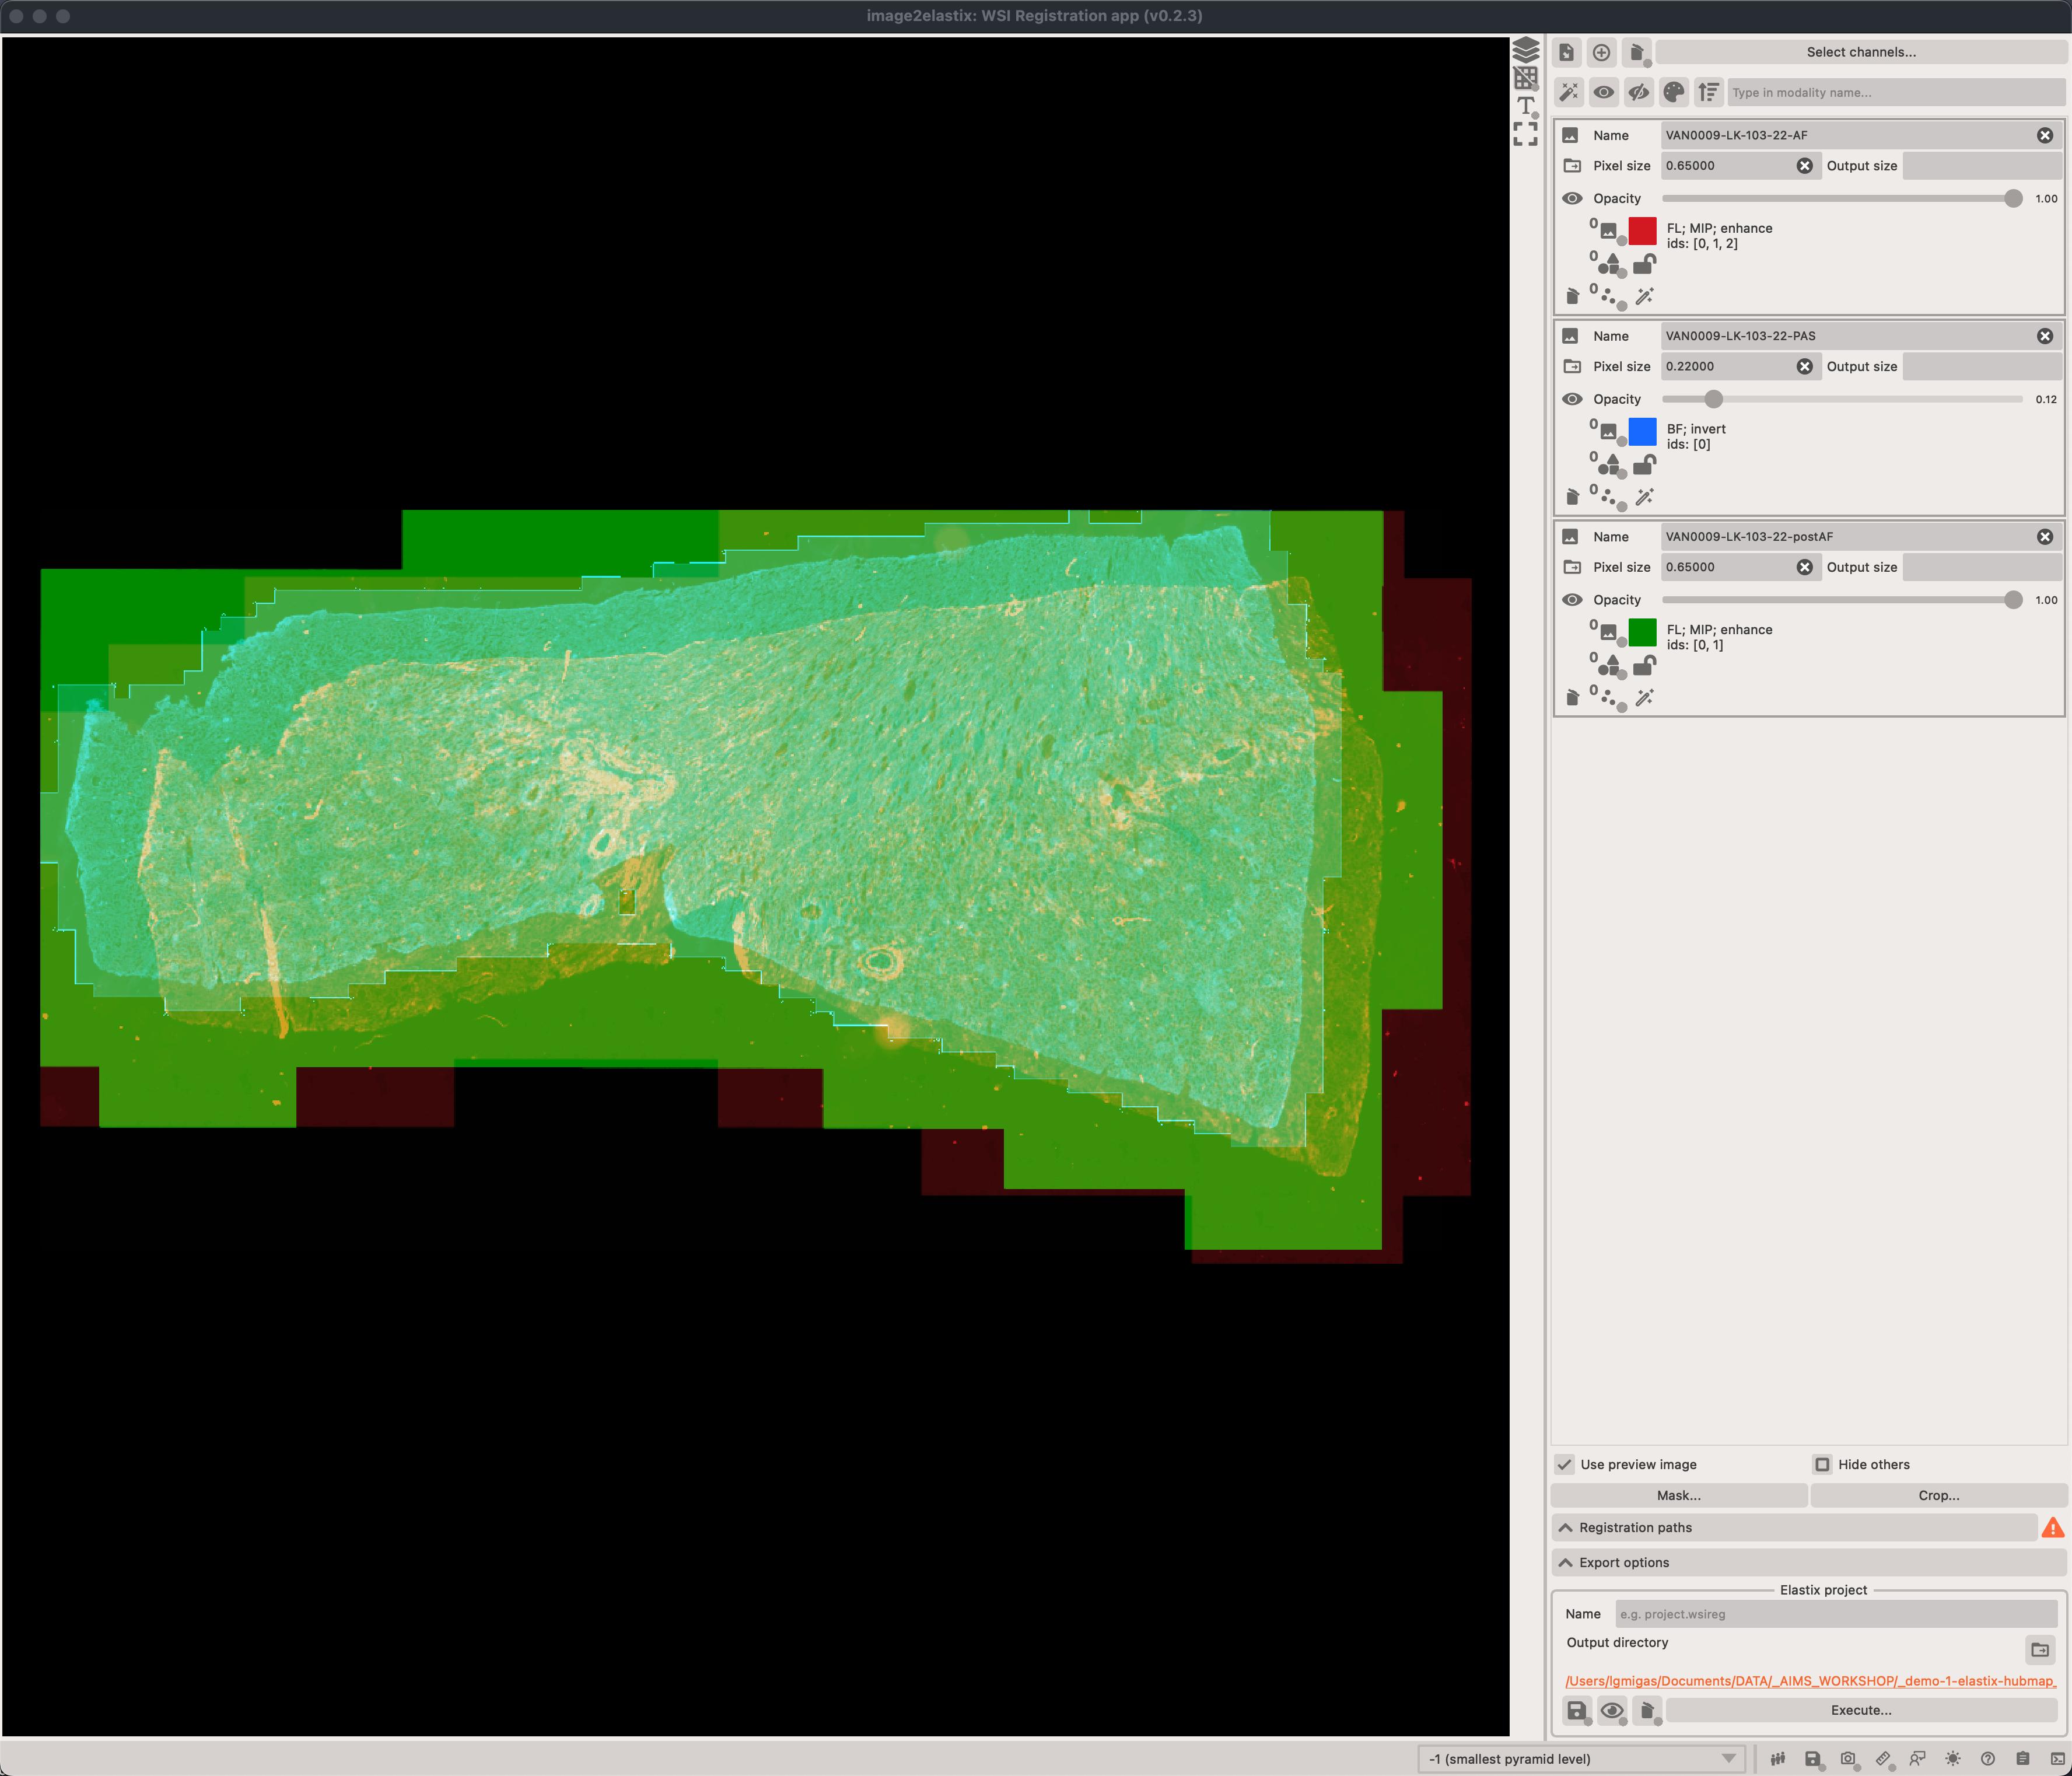
To enable this, make sure to click on the Use preview image checkbox.
Pre-processing
In the top-right corner of the app, you can find the list of image modalities that will be registered. You can adjust the pre-processing parameters for each modality by clicking on the widget or on the Pre-process... button.
The widget also allows you to adjust the name of the modality, spatial resolution (if it was read incorrectly from the file metadata) and the color of the image.
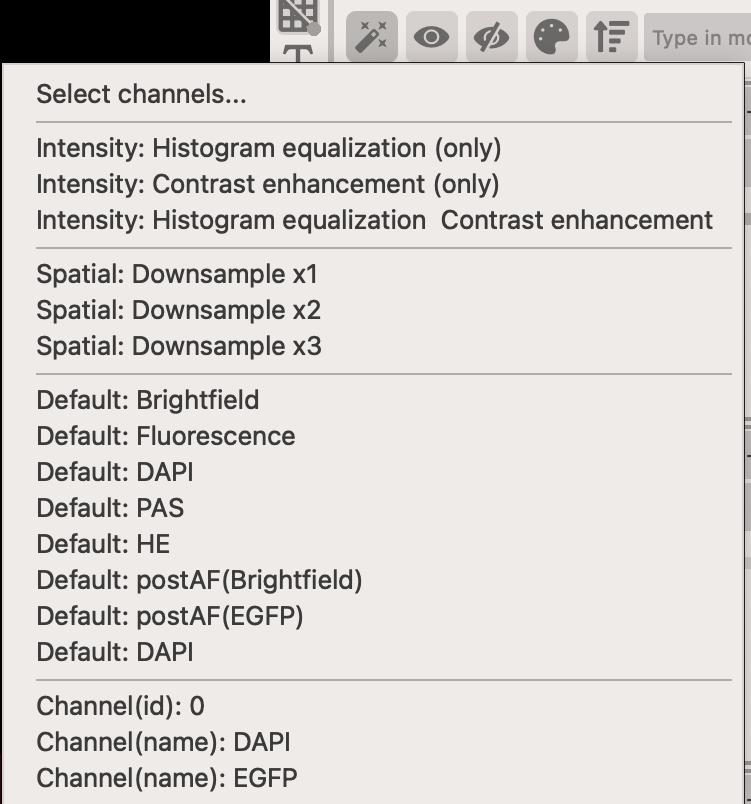
There are a number of pre-processing parameters that can be adjusted to improve the registration process. They can be roughtly divided into two categories:
- Intensity - adjusts how the intensity of the image is transformed.
- Multi-channel images must be turned into a single-channel image, usually done by using
maximum intensity projection. - You can improve the contrast of the image channels by using
histogram equalizationorcontrast enhancement(or both). - if your image is
light or dark background(e.g. H&E) then you mustinvertthe intensities
- Multi-channel images must be turned into a single-channel image, usually done by using
- Spatial - adjusts the spatial information of the image
- You can
flip,rotateortranslateimages. This can be useful to give the image a better starting point for registration. - You can
downsamplethe image to speed-up the registration process.
- You can
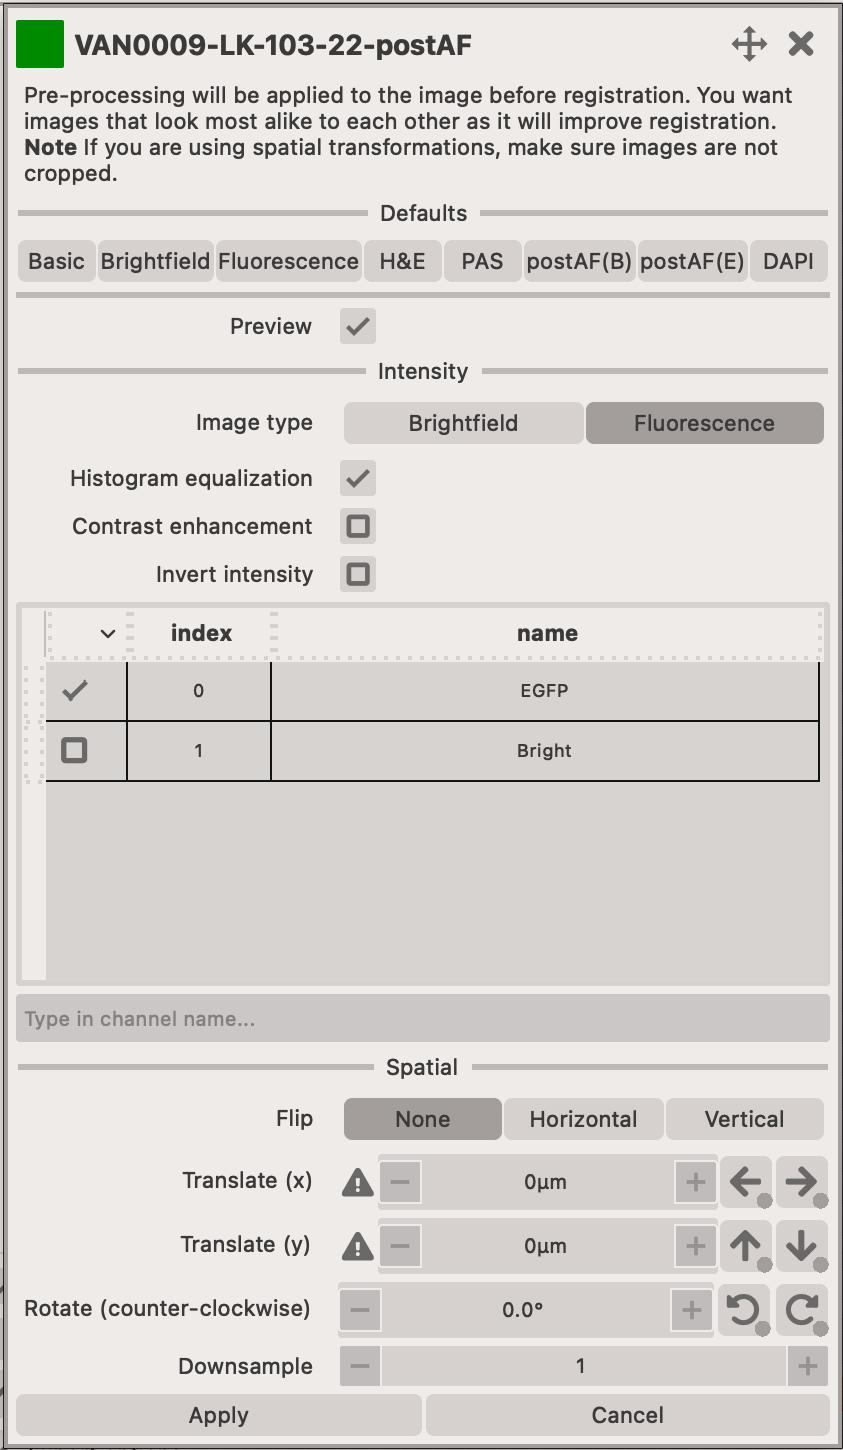
You can apply pre-processing parameters to multiple images at once by using the wand button.
Masking
You can create masks to focus the registration on a specific part of the image. You can start this process by clicking on the Mask... button which opens a new dialog window.
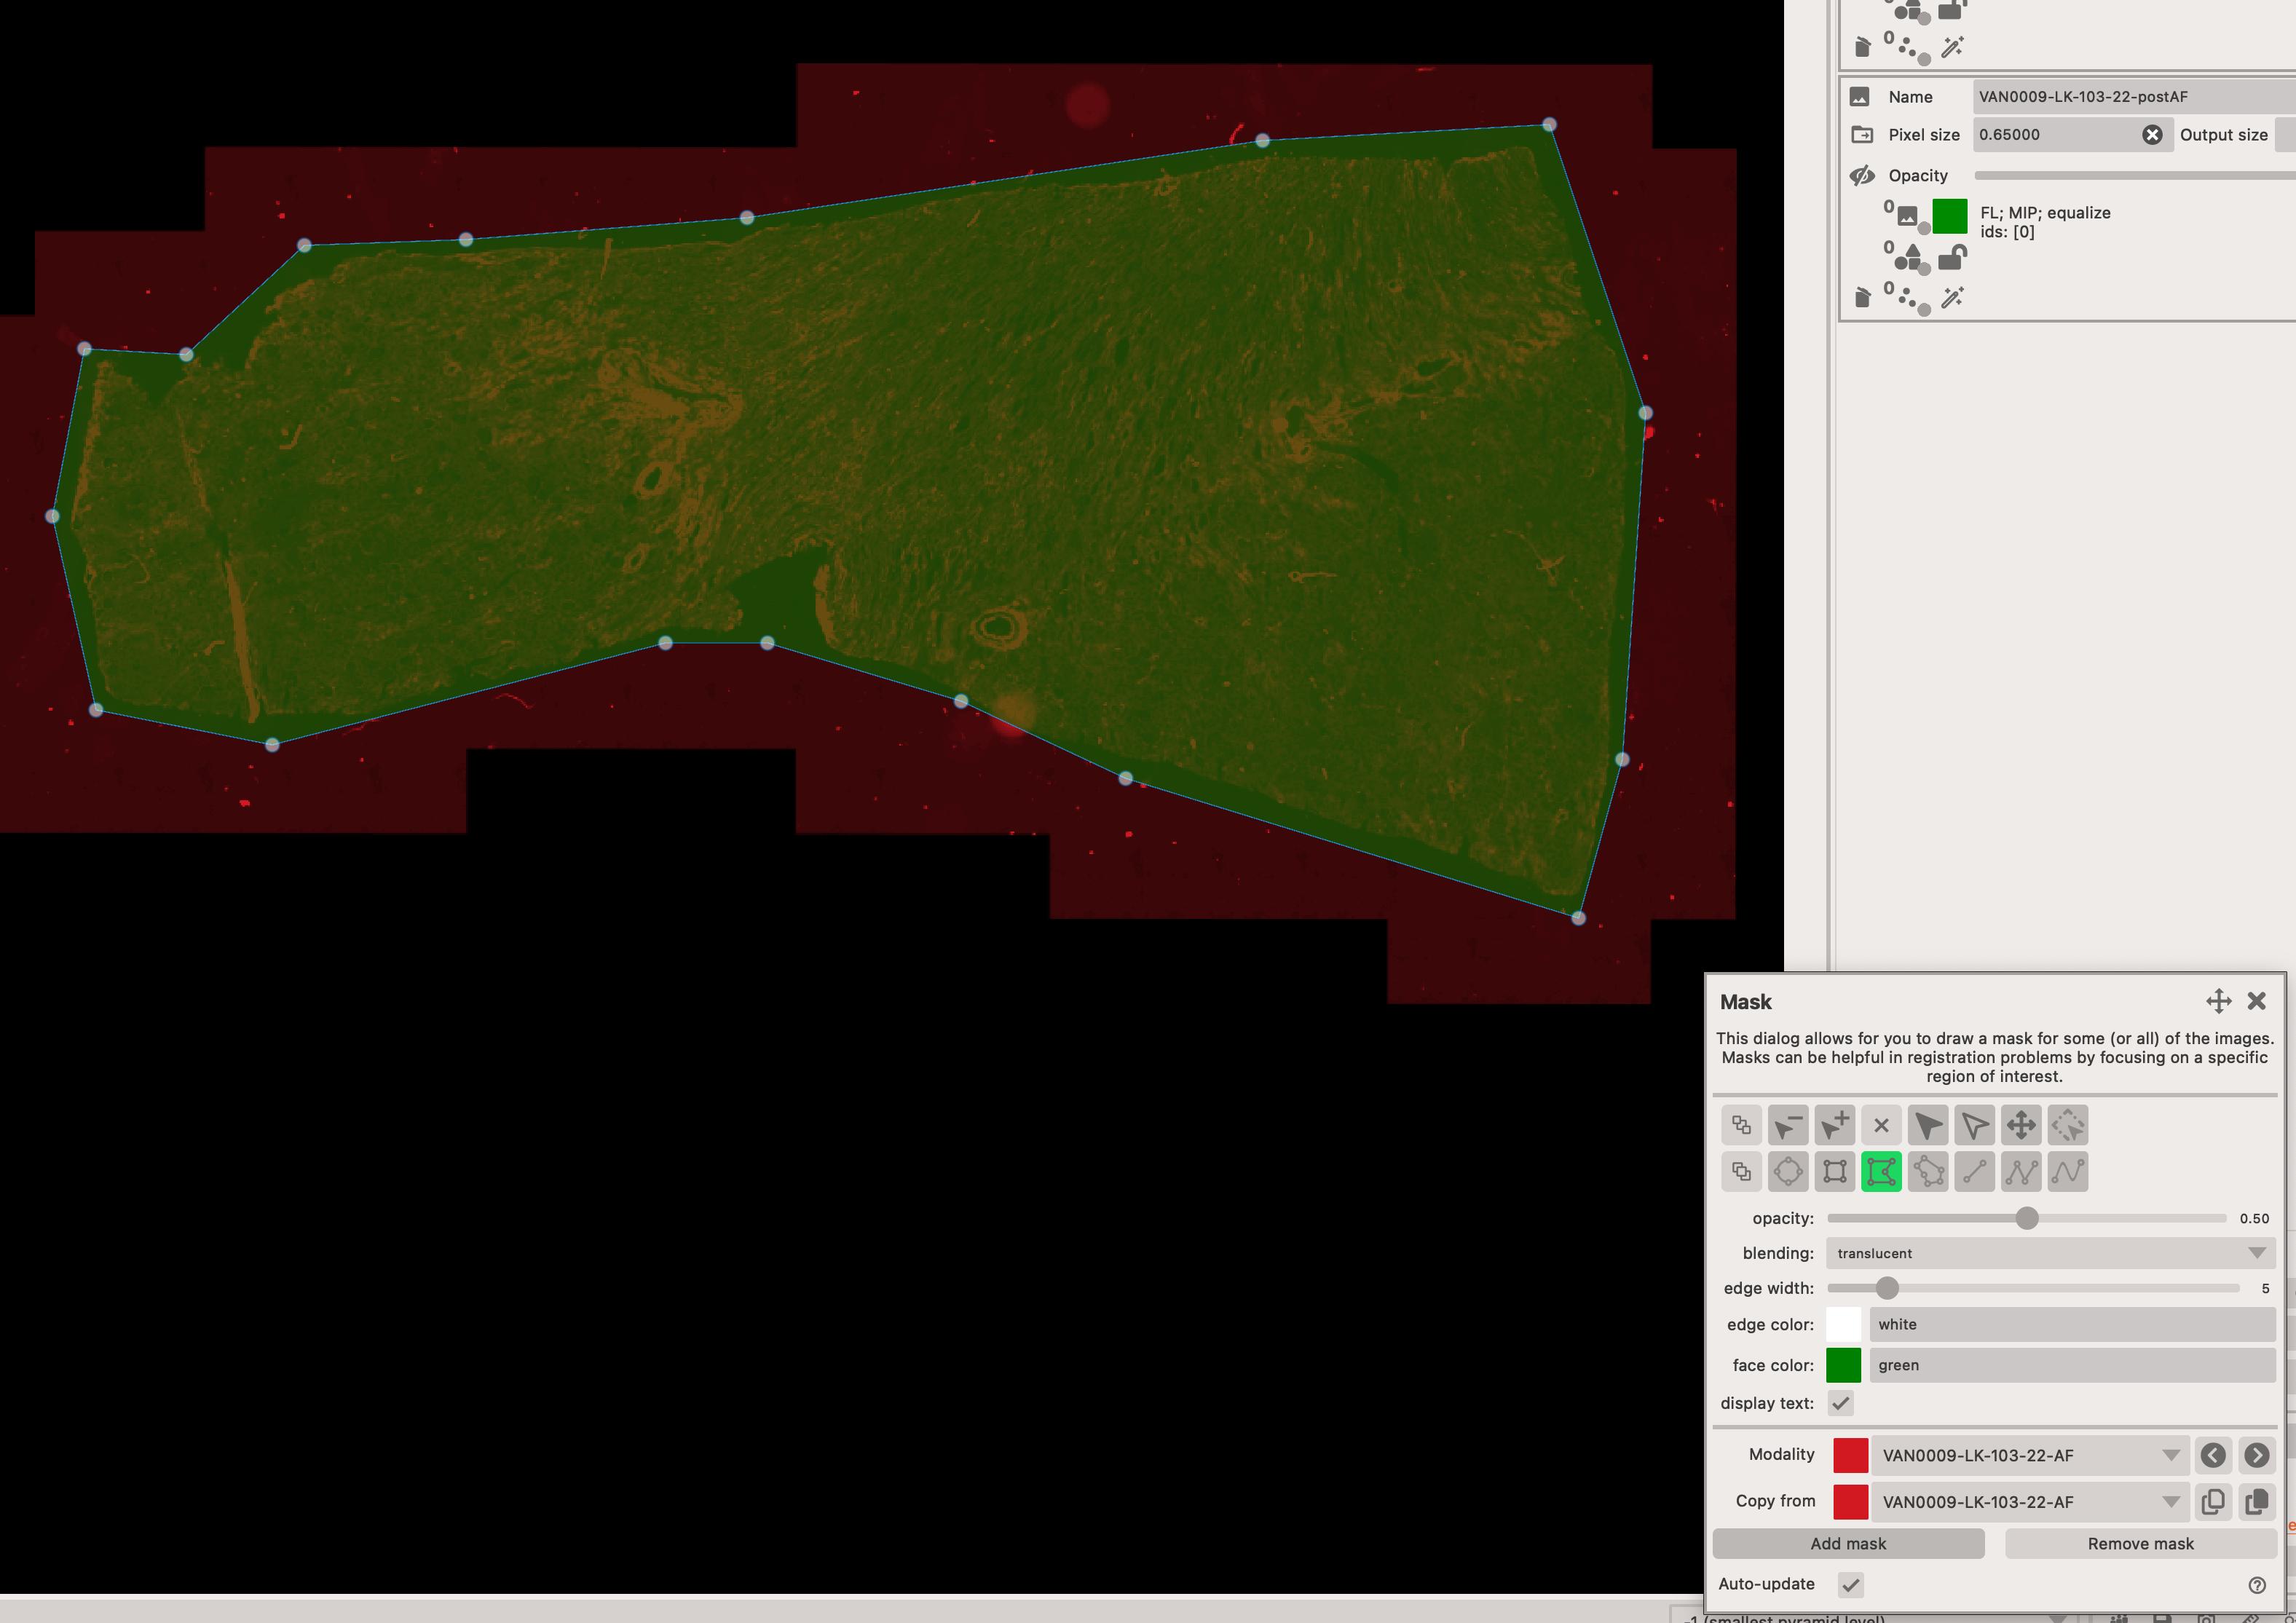
There you can create a mask for each modality that is being registered.
Click on Add mask
It's important that you click on the Add mask button to create a new mask. If you don't do this, the mask might not be saved and you will have to start over.
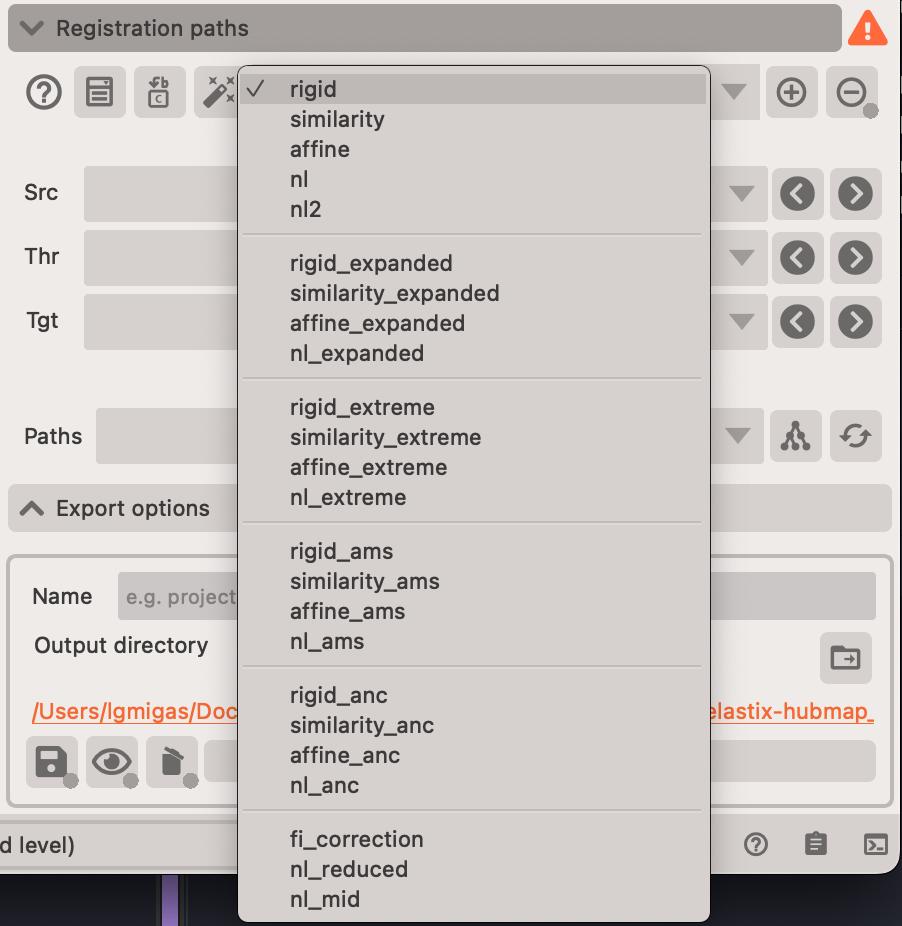
Registration paths
Just like in wsireg, we are using registration paths to define which images should be registered together.
There is always a source modality which is going to be moved to the target modality. You can also define a through modality, which is a modality that the source is going to be registered to first, and then the target is going to be registered to the through modality.
There are many options available ranging from rigid, affine to non-linear options.
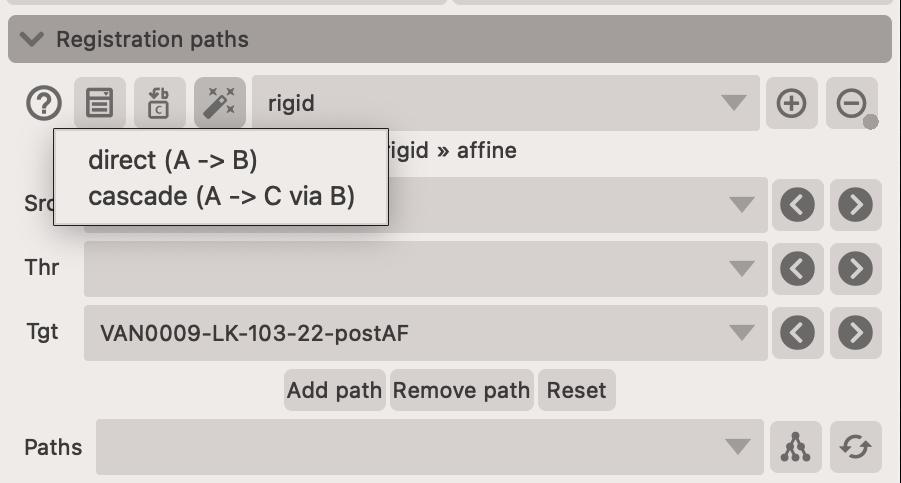
If you are creating fairly straightforward registration paths, you can use the wand button. This will create either a:
directpaths between the images, where you must select thetargetimage and the other images becomesources.cascadepaths between t he images, where you must select thetargetimage and the source images are registered in sequence to the target image. This is particuarly helpful when dealing with a lage number of images (e.g. 3-D registration from 2-D images). So if you had images, A, B, C, D, E, and you selected e.g. C as the target, the paths would be created as follows:- A -> B -> C
- B -> C
- D -> E -> C
- E -> C
You can visualise the registration path by opening the registration network widget.

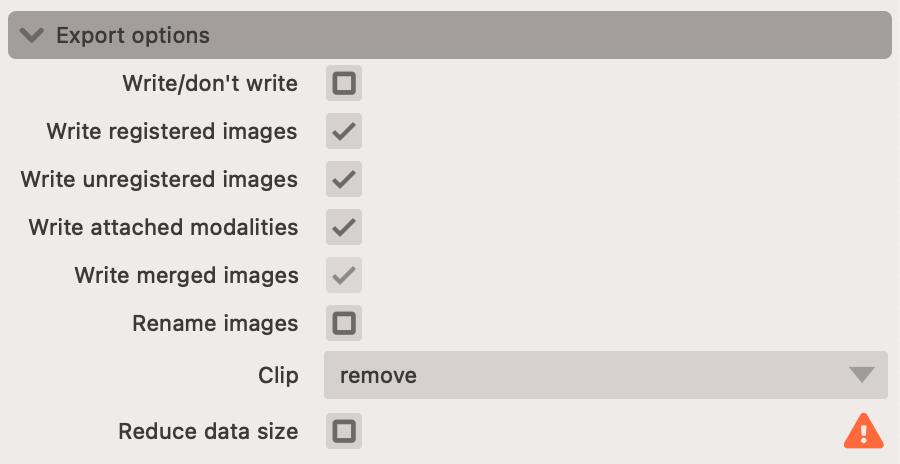
Export options
There are several export options available to you. This includes which images (or attachment modalities) should be transformed and exported.
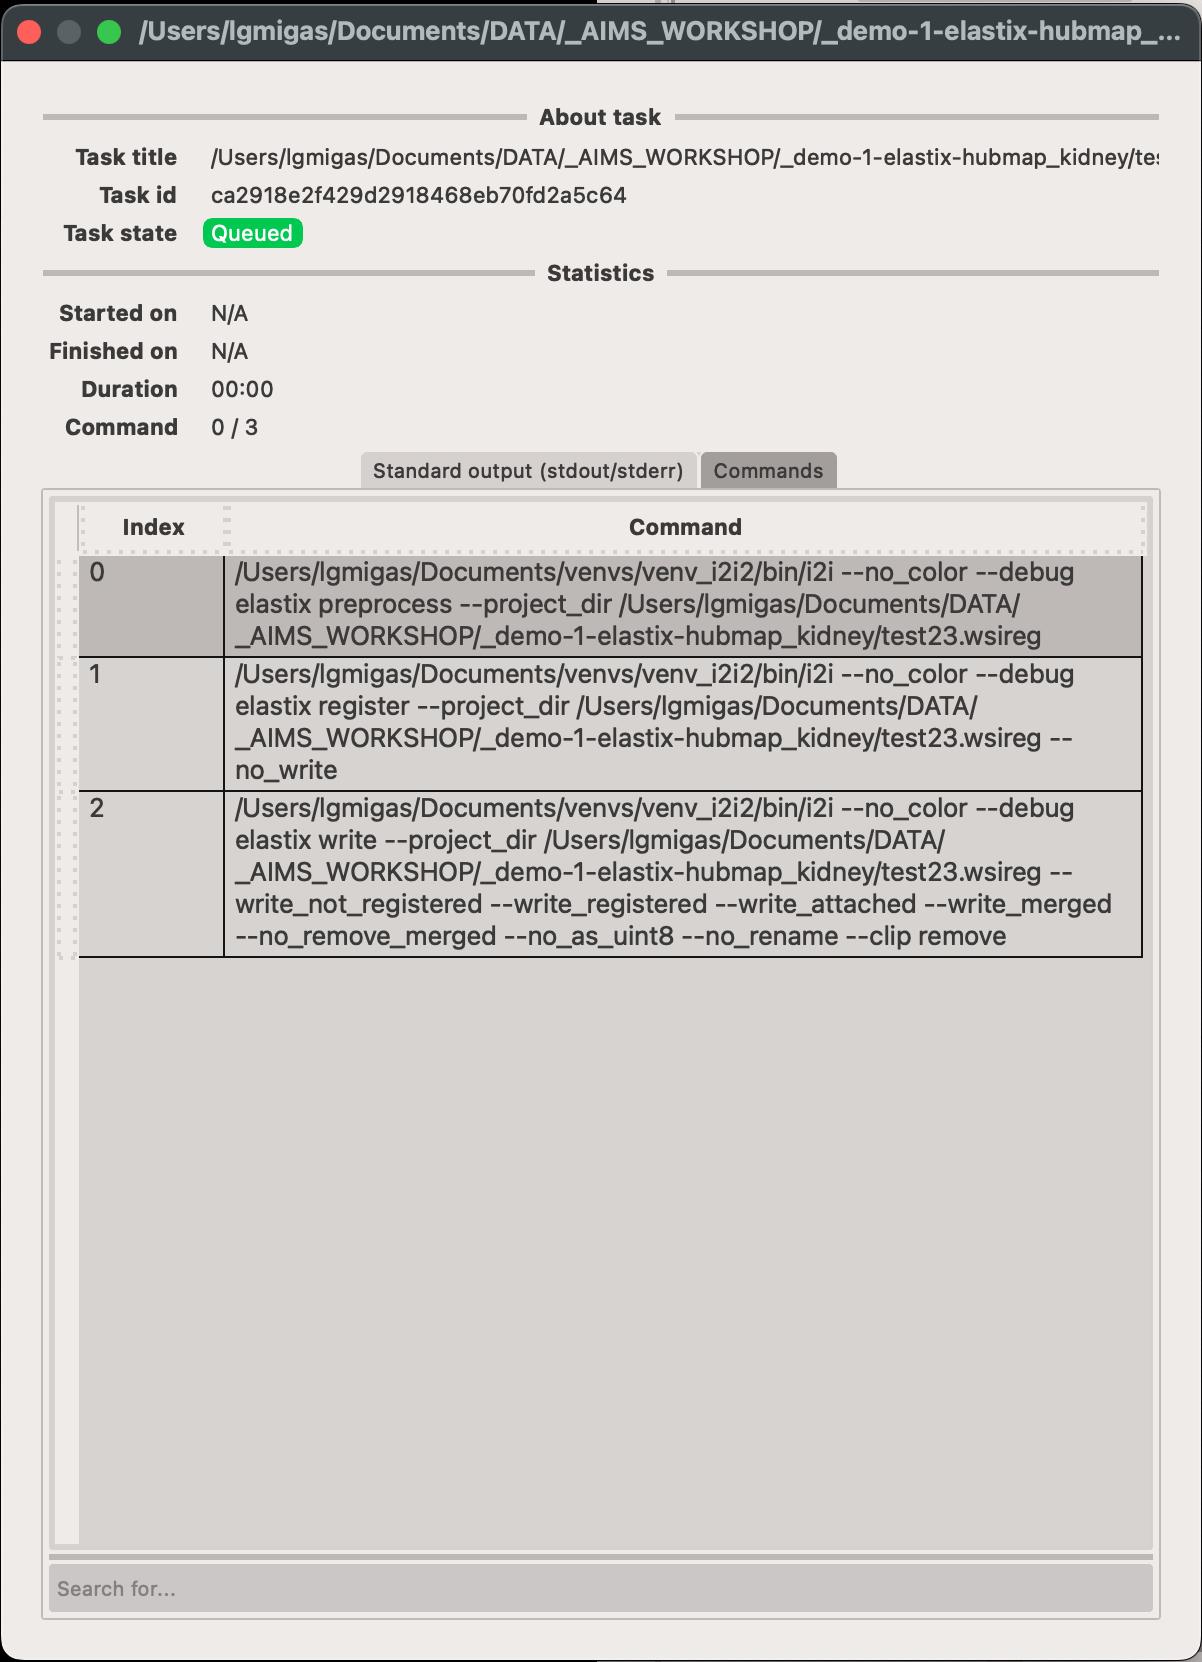
Execution
Registration can be executed directly in the app or via the command-line interface. The command-line interface is more powerful, as it permits batch processing, however, the in-app execution is more user-friendly.
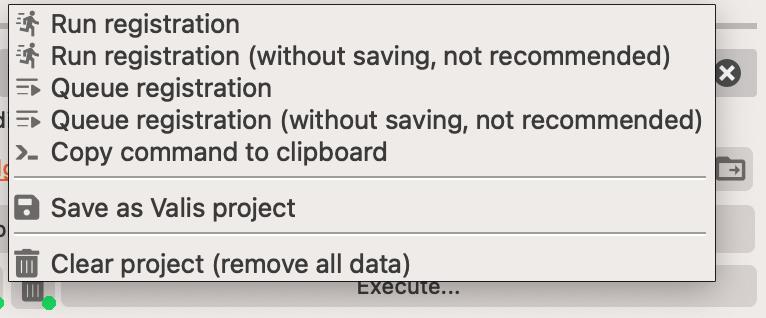
Tasks that are being registered in the app, go the Tasks queue widget. You can access it from the statusbar at the bottom of the app.
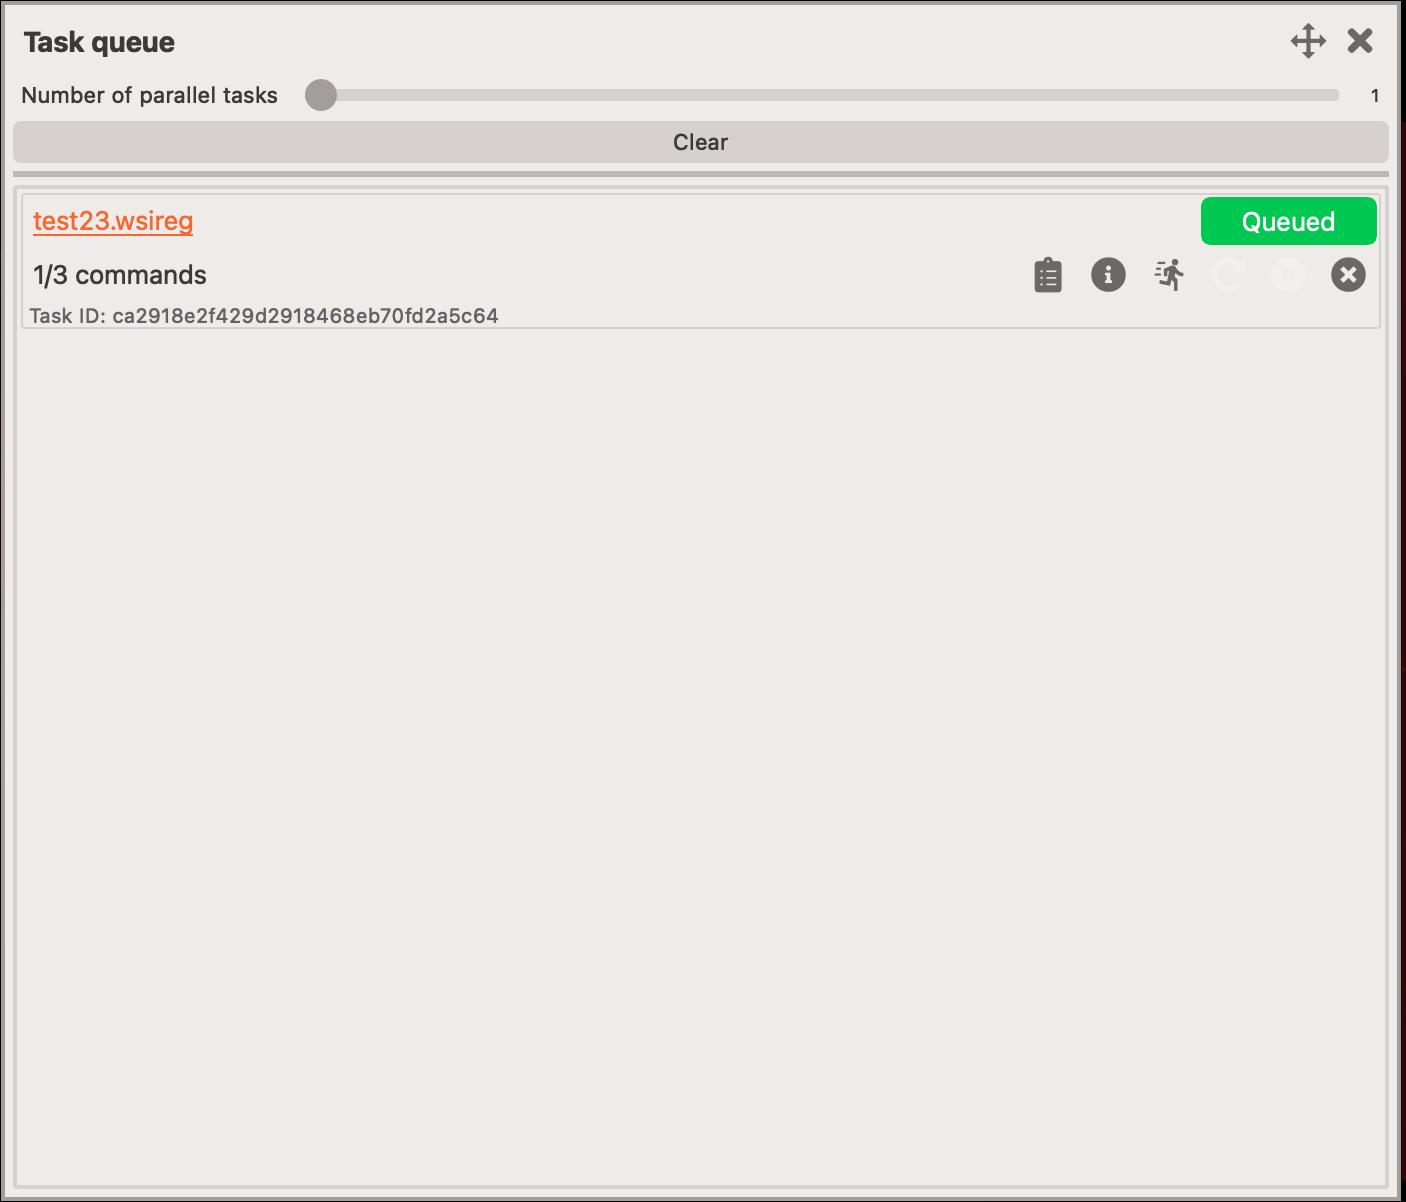
You can monitor the progress of each task in the queue, as well as pause/cancel them if needed. Also, you can view the commands that are being executed for each task.
Project structure
Elastix projects are saved into a <your project name>.wsireg folders that contain several sub-folders that should maintaiance and keeping track of your registration process.
The folder normally contains the following sub-folders:
- Cache - contains the pre-processed images and masks. You should check this folder when registration fails and see whether the pre-processed images look anything alike.
- Images - contains the registered images. This folder will contain any
registereddata including images, GeoJSONs, point data, etc. - Logs - contains the logs of the registration process. This can be useful to check what
commandswere executed on the project. - Progress - contains the progress of the registration process. This folder contains miscellaneous files that are used to keep track of the registration process.
- Transformations - contains the transformation matrices. This folder contains the
elastixtransformation data that can be used to transform the microscopy images (and any associated data) to the new coordinate system.